Using Jupyter Notebooks
Last modified: July 22, 2019
Now that you have learned how to install Jupyter notebooks on an EC2 server, it is time to learn how to use Jupyter notebooks. Jupyter Notebook provides a portable development environment for easy collaboration and sharing of coding projects. Running your notebook on a server allows you to run queries from any computer that has access to your server.
Copying Databases into an EC2 Server
Before accessing your Jupyter notebook you should transfer the database files that you would like to develop queries for into your server. Once you connect to your EC2 your terminal will be used to control your server.
The easiest way to transfer files into an EC2 server is with scp, which stands for “Secure copy”. scp is a function built to securely copy files over SSH. To move your files onto EC2 you will need to run:
scp -i /path/to/key.pem /path/to/file user@ec2address
scp works easily with CSV’s and allows for quick deployment of your Jupyter Notebooks.
Using Jupyter
Before creating a Jupyter Notebook you need to decide what language you are going to be coding in. Jupyter provides many built in languages including R, Julia, and Scala. This article is going to focus on Python3, a high level language that is often used in data analytics.
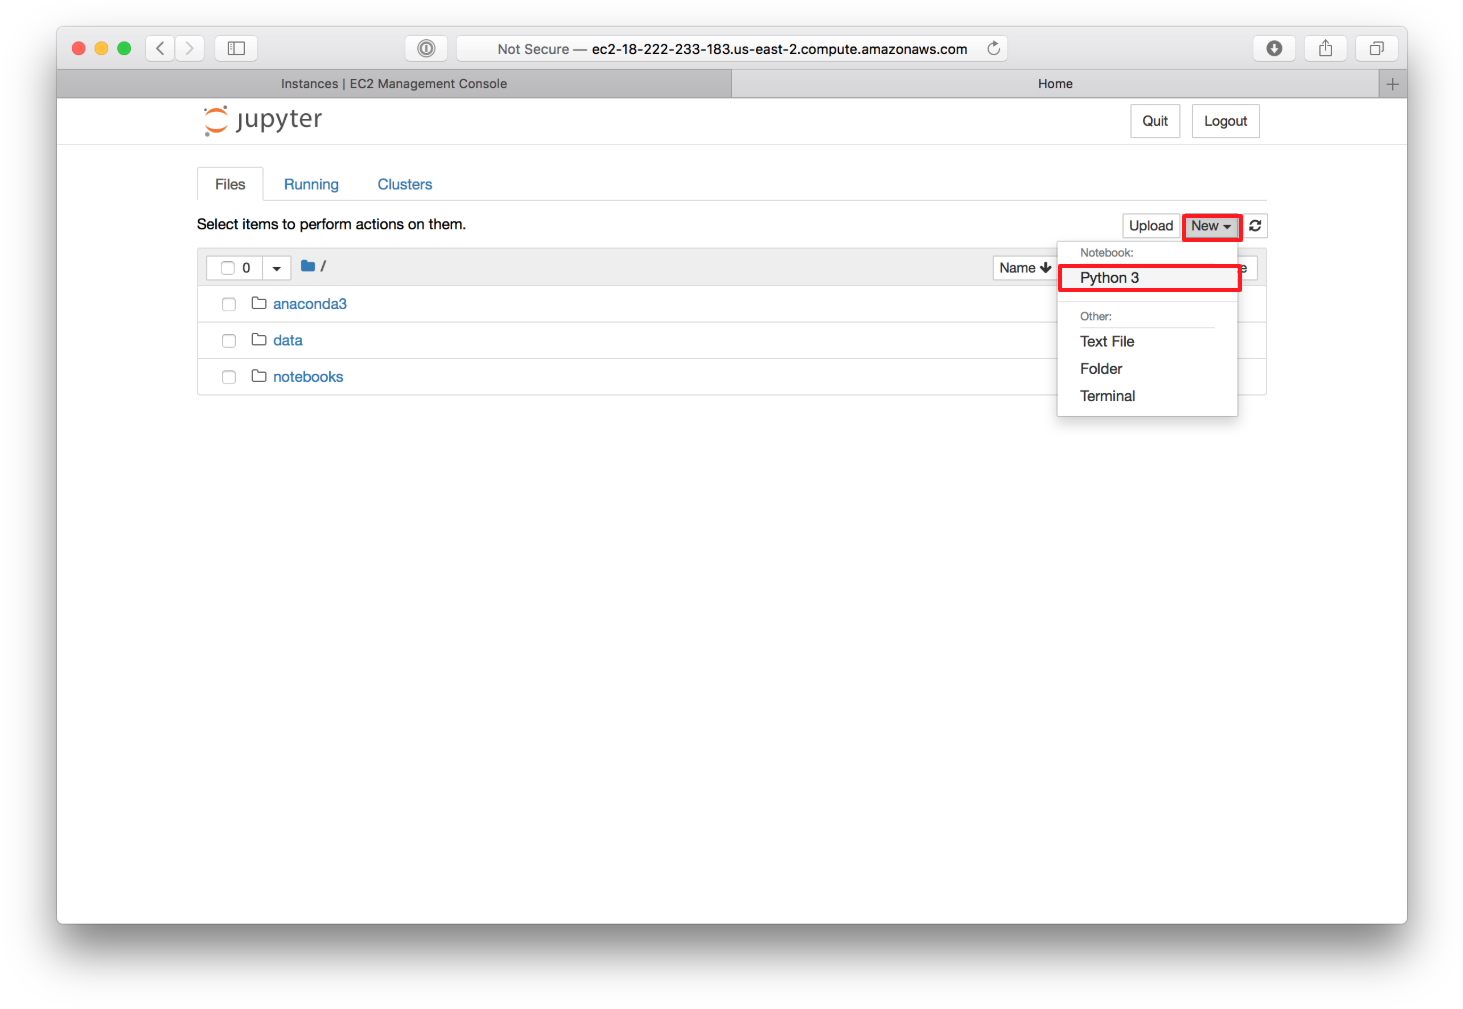
It is recommended that you organize your notebooks in folders in order to avoid having a messy and confusing notebook structure. When creating your first notebook, navigate to the desired folder, click “New” and then click “Python 3” in the drop down menu:
Once you click on “Python 3”, your new notebook will open and display in a new window:

From here, you can begin writing your Python code to access, process, and analyze your databases.
Example Notebook
For this example we will be using a notebook called “TestNotebook” and a dataset called “Shop”, which stores values that could be found at a local shop.
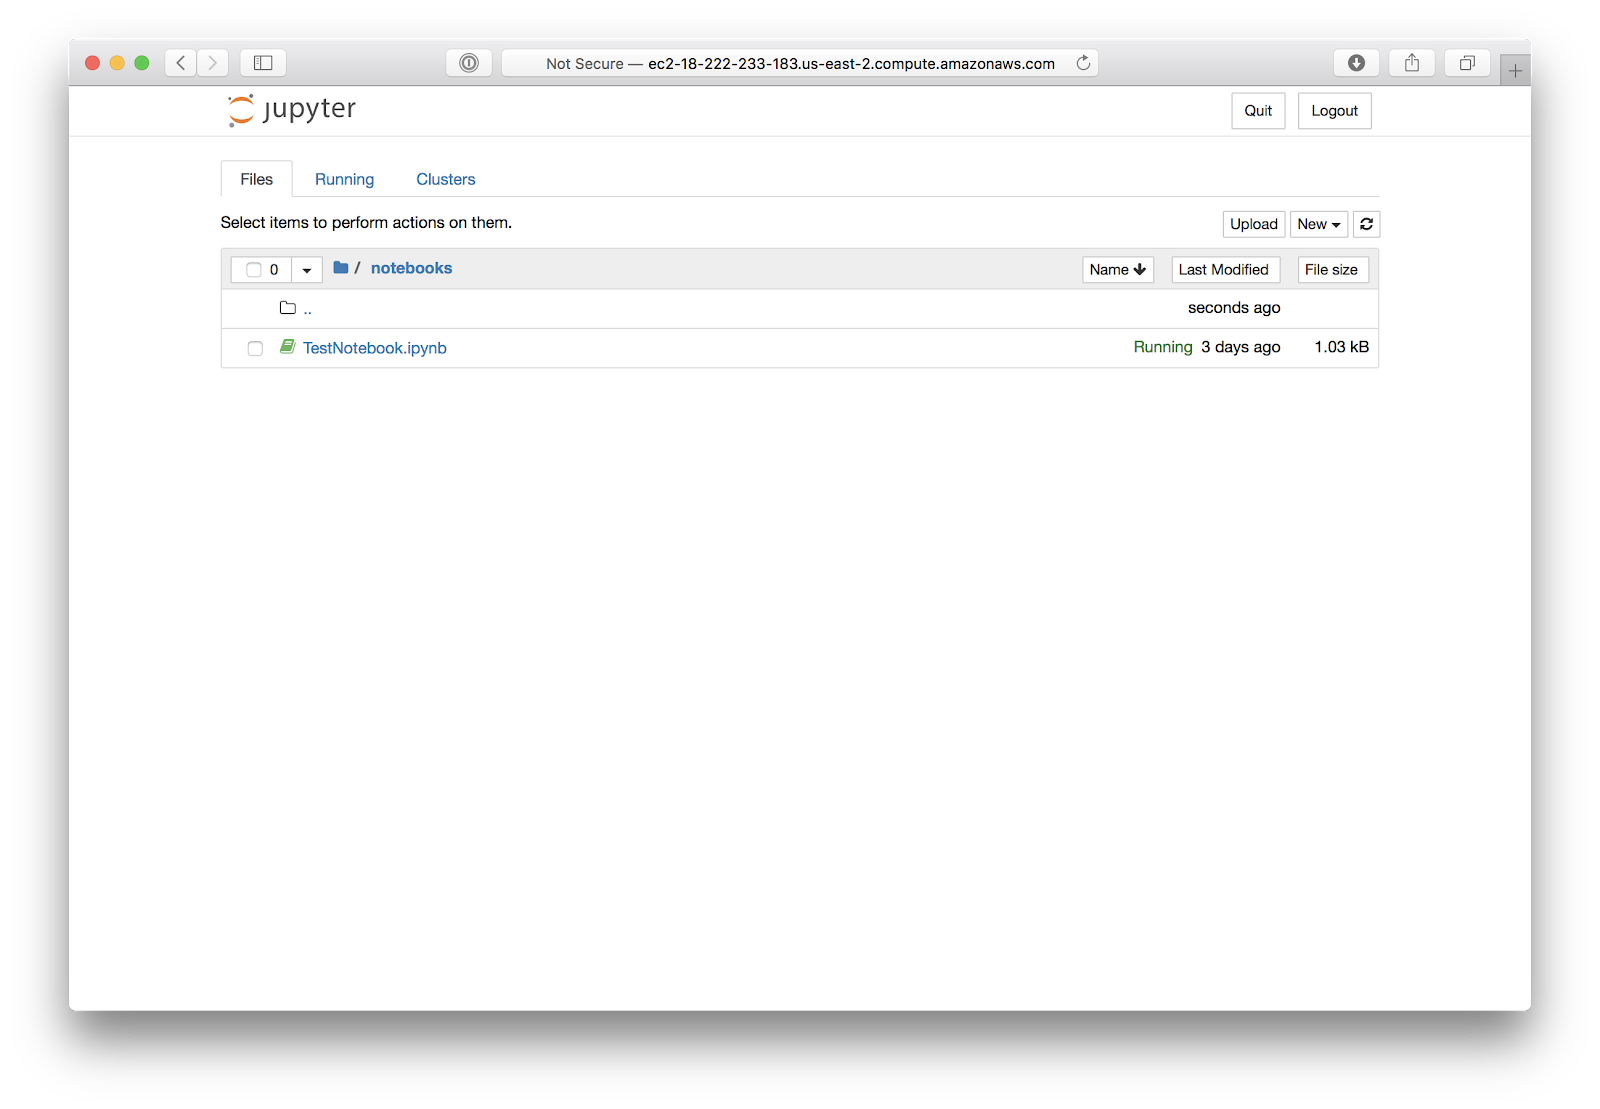
TestNotebook in the notebooks folder:
Shop.csv in the data folder:
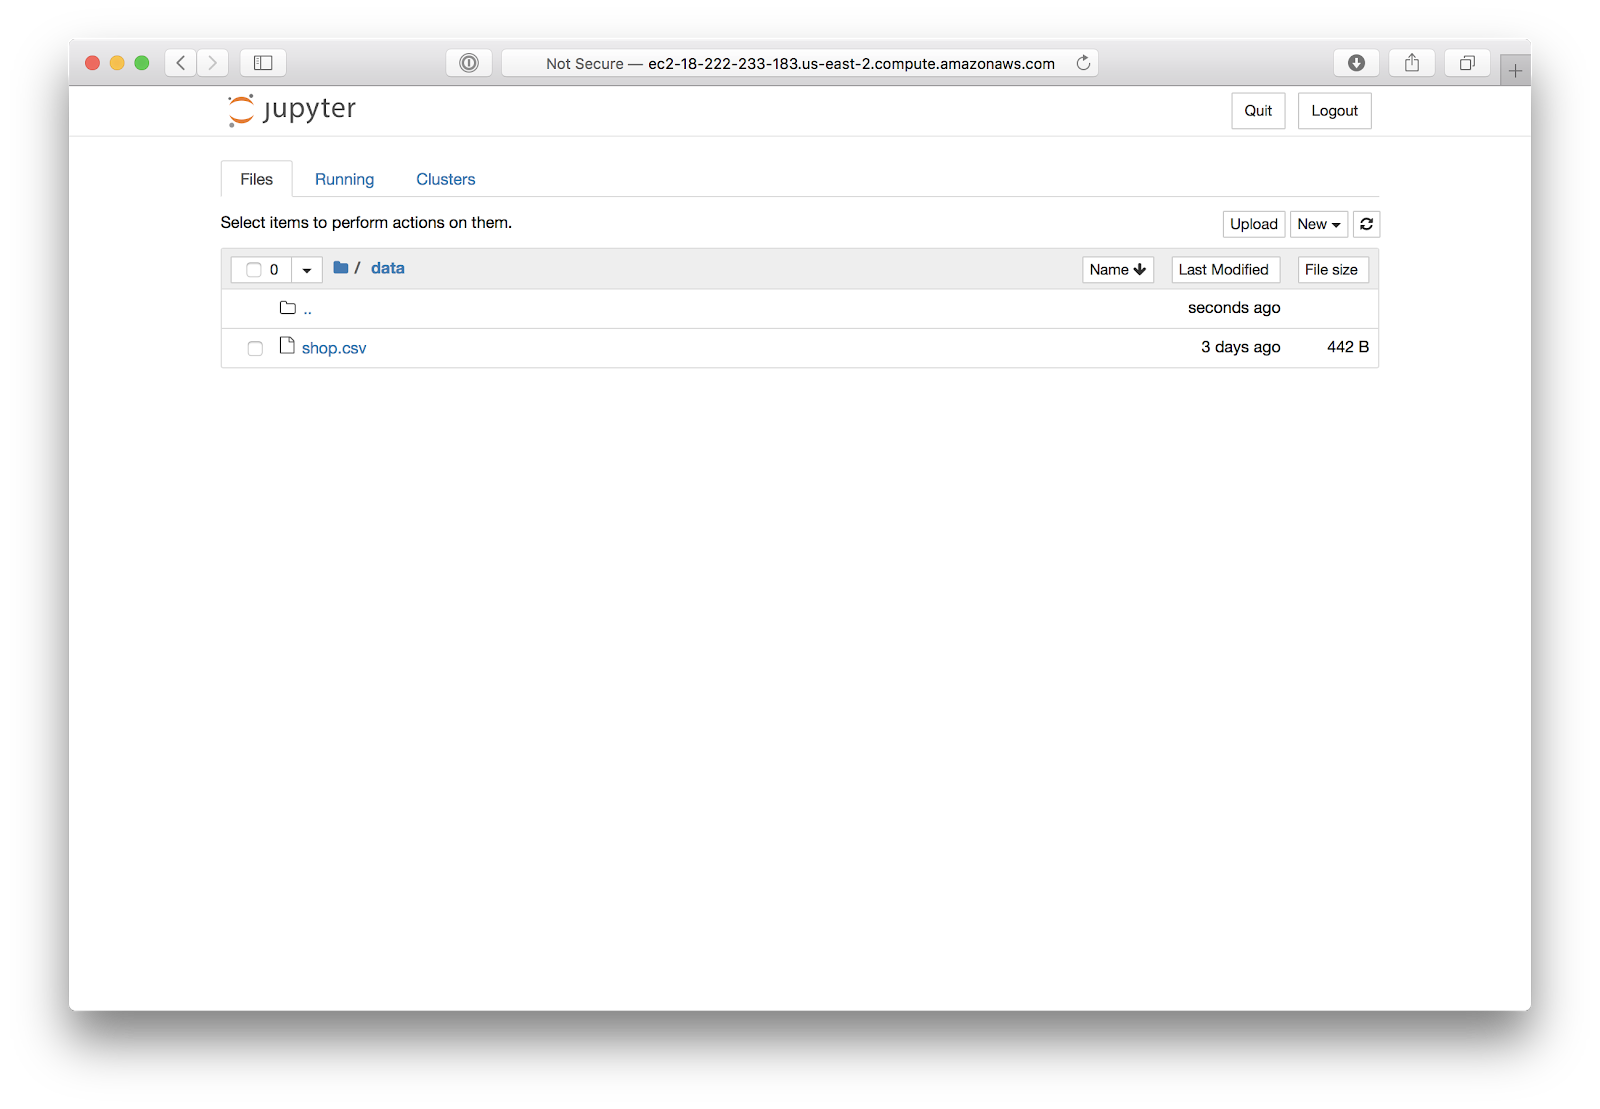
Something to consider when expanding your notebook use is creating folders, as seen above, for storing and organizing your files into groups. The file “shop.csv” is in a folder called “data”, and “TestNotebook.ipynb” is in a folder called “notebooks”.
pandas and numpy
There are two main packages that are necessary for data analytics in Python.
- The first is
pandaswhich is a combination of the words “PANel” and “DAta”.pandasis used to import and create data tables. - The second is
numpywhich creates the data structures necessary to run data queries in Python.numpyis also the basis forpandaswhich relies on thenumpydata structures to create its tables.
The basic steps of performing a data analytics project in python are:
- Import Python’s file reader(
pandas) and data analyzer(numpy). - Use
pandasto import your.csvfile. - Use
numpyto create a readable array. - Use
numpyagain to perform an aggregation of that array.
A full list of [numpy](https://jakevdp.github.io/PythonDataScienceHandbook/02.04-computation-on-arrays-aggregates.html) functions can be found here.
Following Along
Say you wanted to find the average value of items in the Shop. You could write a query like this:
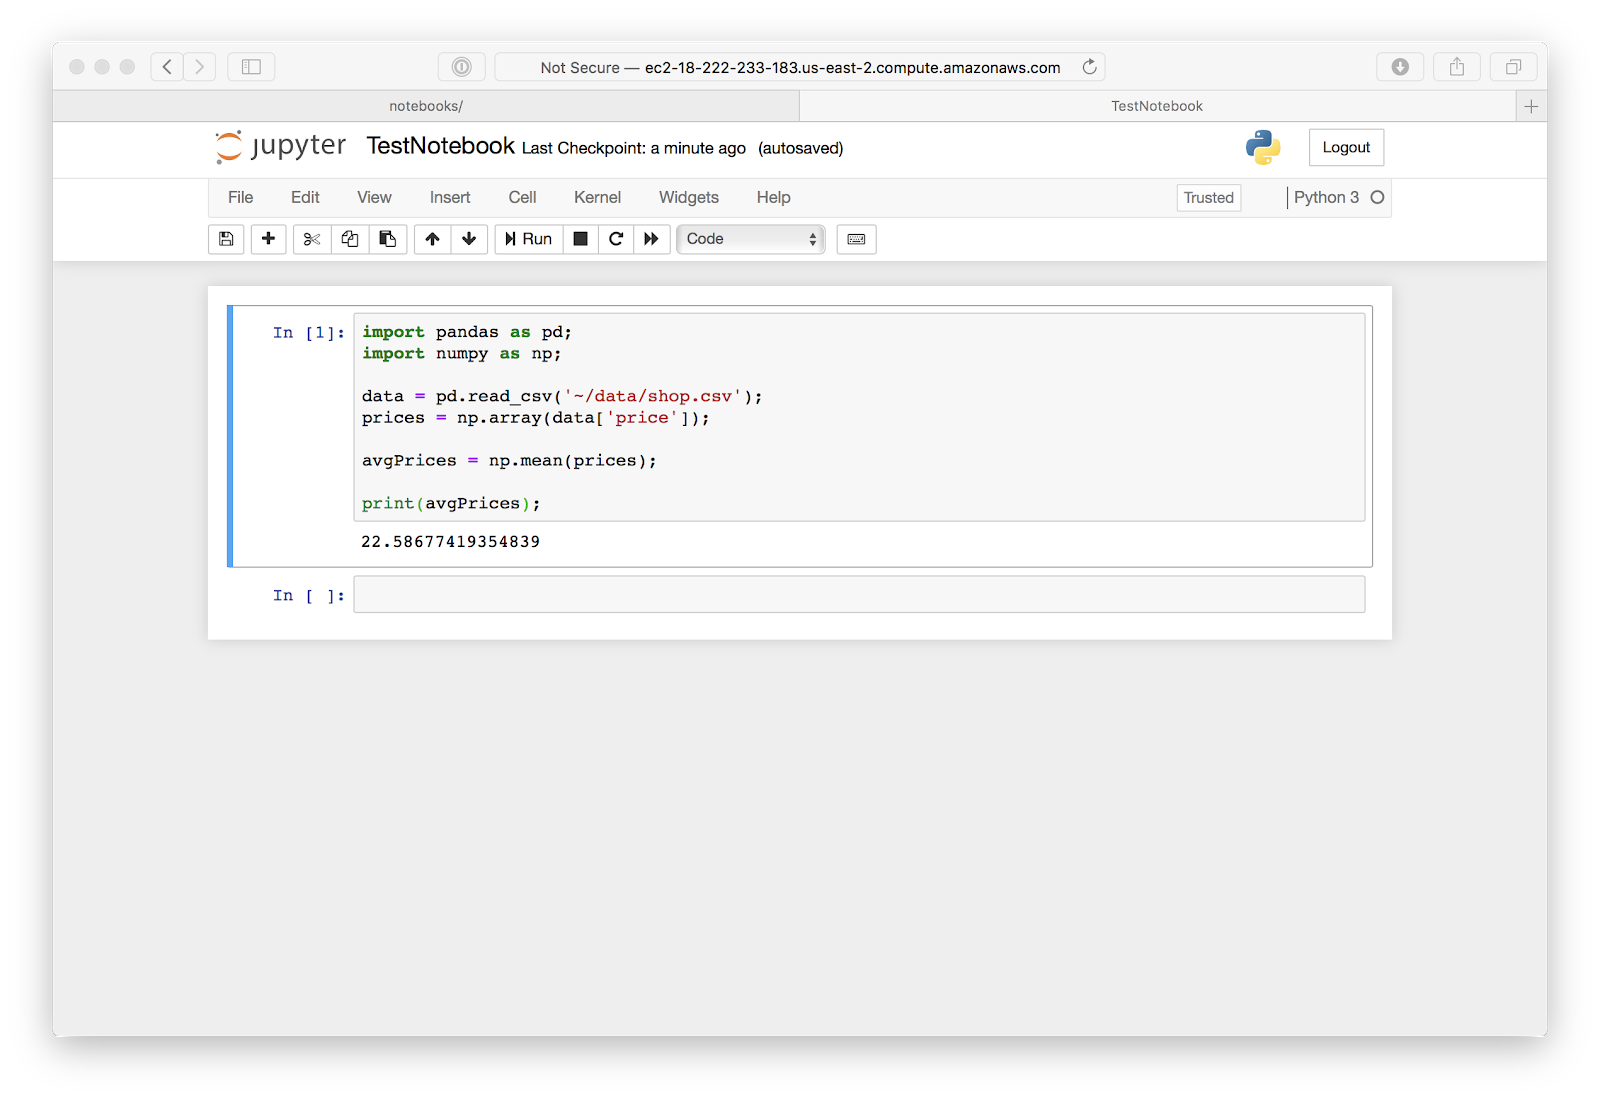
import pandas as pd;
import numpy as np;
Importing pandas and numpy is required to use them to perform data analytics. You can also use as to change the keyword used to access the given library. This allows you to access the pandas library by calling pd.[method name]() and the numpy library by calling np.[method name]().
data = pd.read_csv(‘~/data/shop.csv’);
prices = np.array(data[‘price’]);
You can then use the read_csv() method from pandasto read in a .csv file. To do this you must specify the location of the file in your file as the parameter for the method.
You can then use numpy to read from the file and creates an instance of a Python datatype, ndarray, from one of the columns. In this case we are selecting the price column from the shop.csv. To do that, use the method array and pass the column you want to perform aggregations on as the parameter of the method.
avgPrices = np.mean(prices);
You can then use the mean method from numpy to find the mean of all of the data in the ‘Prices’ column of the table. This value is then saved to the avgPrices variable.
print(avgPrices);
The value of avgPrices is then printed to the console with the print command.
For a full python data analysis tutorial click here.
References:
https://docs.aws.amazon.com/AWSEC2/latest/UserGuide/AccessingInstancesLinux.html
https://jakevdp.github.io/PythonDataScienceHandbook/
Written by:
Blake Barnhill
Reviewed by:
Matt David
,
Matthew Layne