Creating an EC2 Server
Last modified: July 19, 2019
What is an EC2 Server?
EC2 provides a variety of operating systems and hardware levels for a wide variety of uses that can be easily scaled in the cloud. Whether you are an individual looking to host some small projects on the web or a large company trying to host and automate large databases or websites, EC2 can support you.
EC2 servers are a service provided by AWS(Amazon Web Services). These are Amazons way of providing a way to run servers without having to spend the upfront cost of buying the hardware components to host a server. Amazon provides these servers for a low monthly cost, some of them free in your first year of using AWS.
Creating your EC2
Step 1: Create an AWS account
If you do not have an AWS account, you will need one for the rest of the steps. If you already have an AWS account, login and navigate to the product page.
Step 2: Creating an EC2 Instance
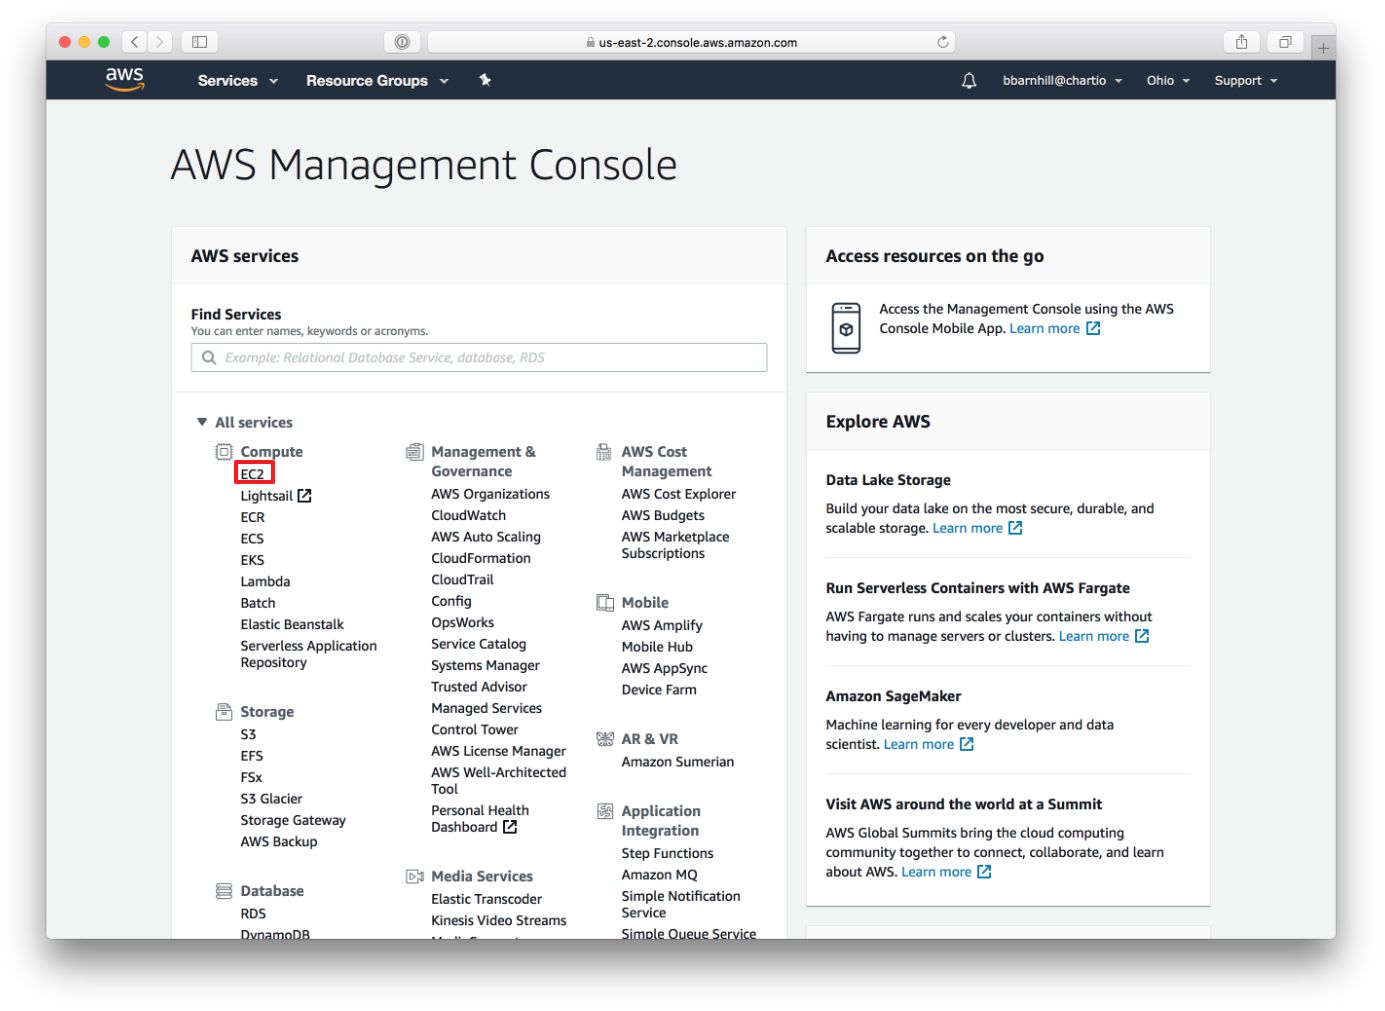
On the product page, find the section labeled “Compute” and click on “EC2”:
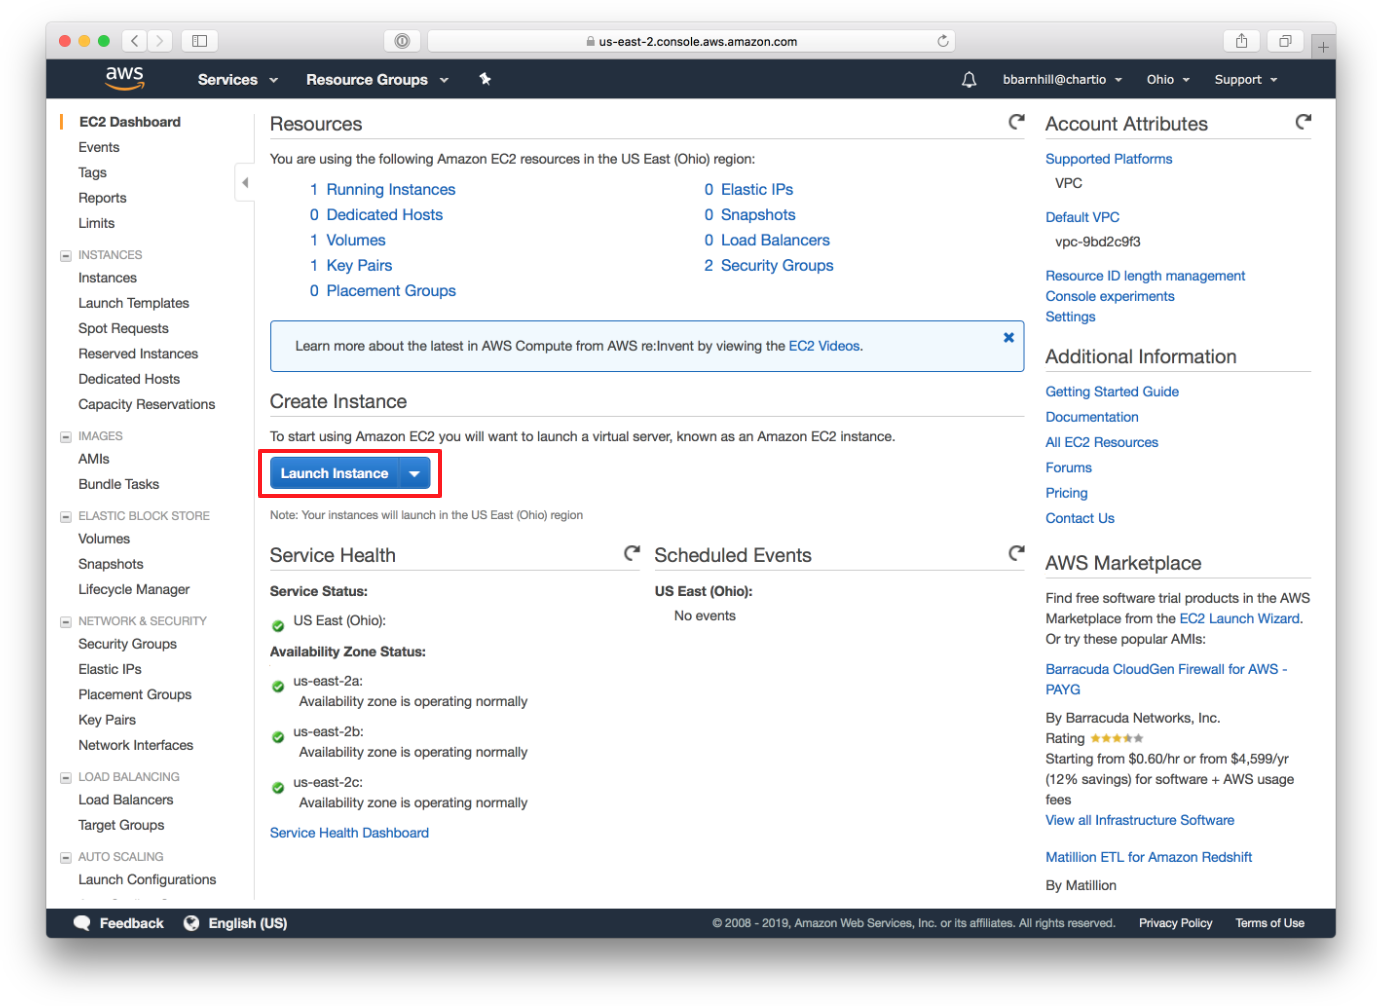
From there click “Launch Instance” to begin creating an EC2 server:
Step 3: Picking an operating system
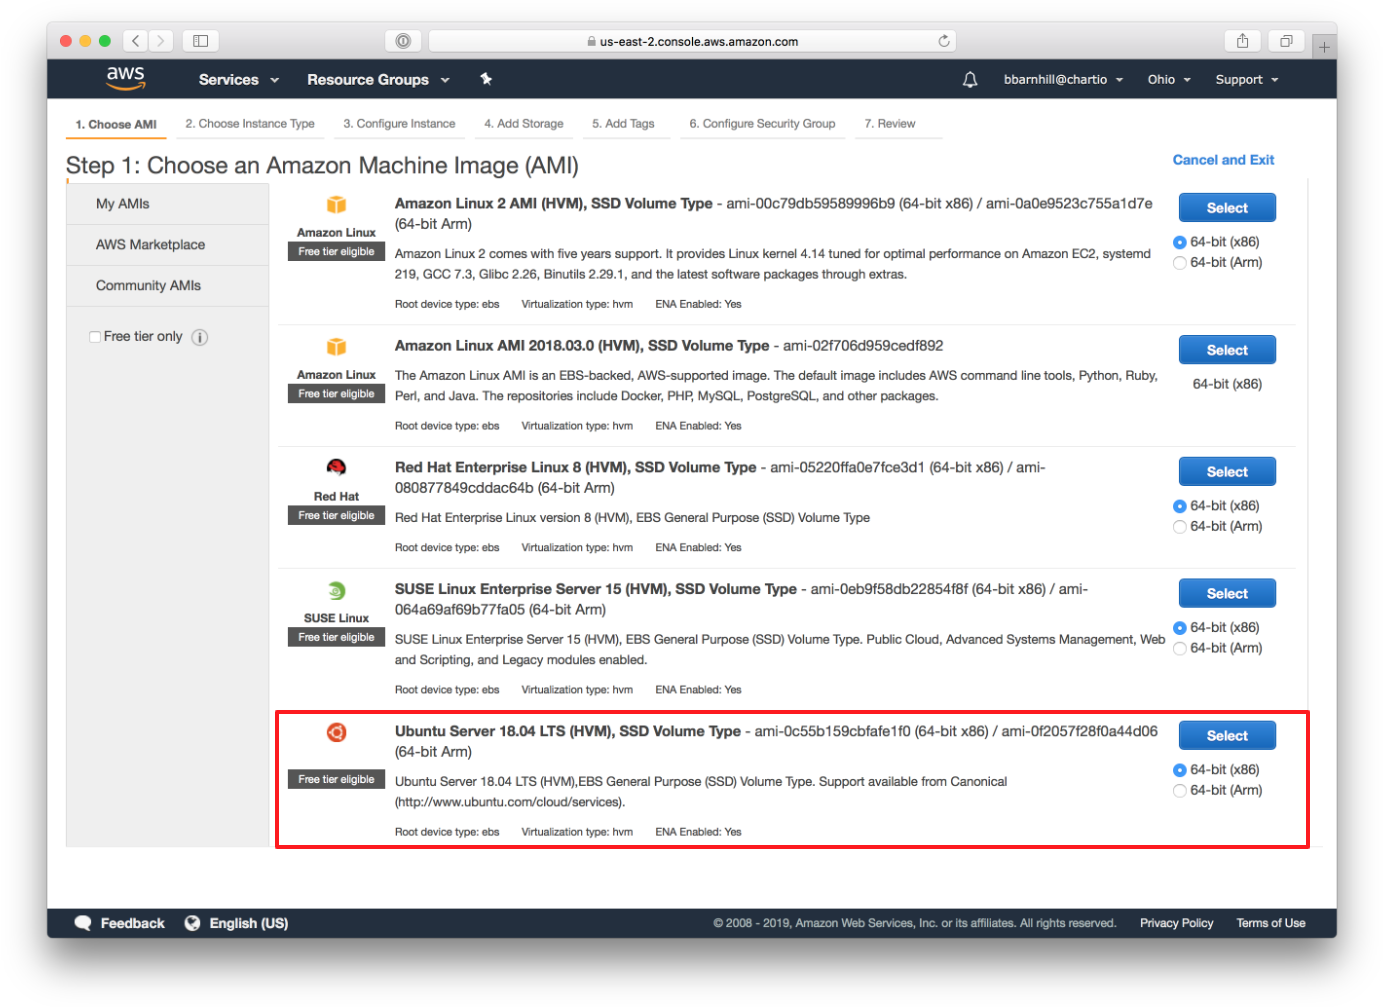
EC2 has a large variety of operating system available and you are free to pick whichever works best for your needs. The main differences between the operating systems are whether they are based on Windows or Linux. Windows based OS are designed to run several Windows specific programs, while Linux OS’s are designed to be minimal and fast. More information on the specific operating systems provided by AWS here.
For the purpose of this tutorial we will using Ubuntu Server 18.04:
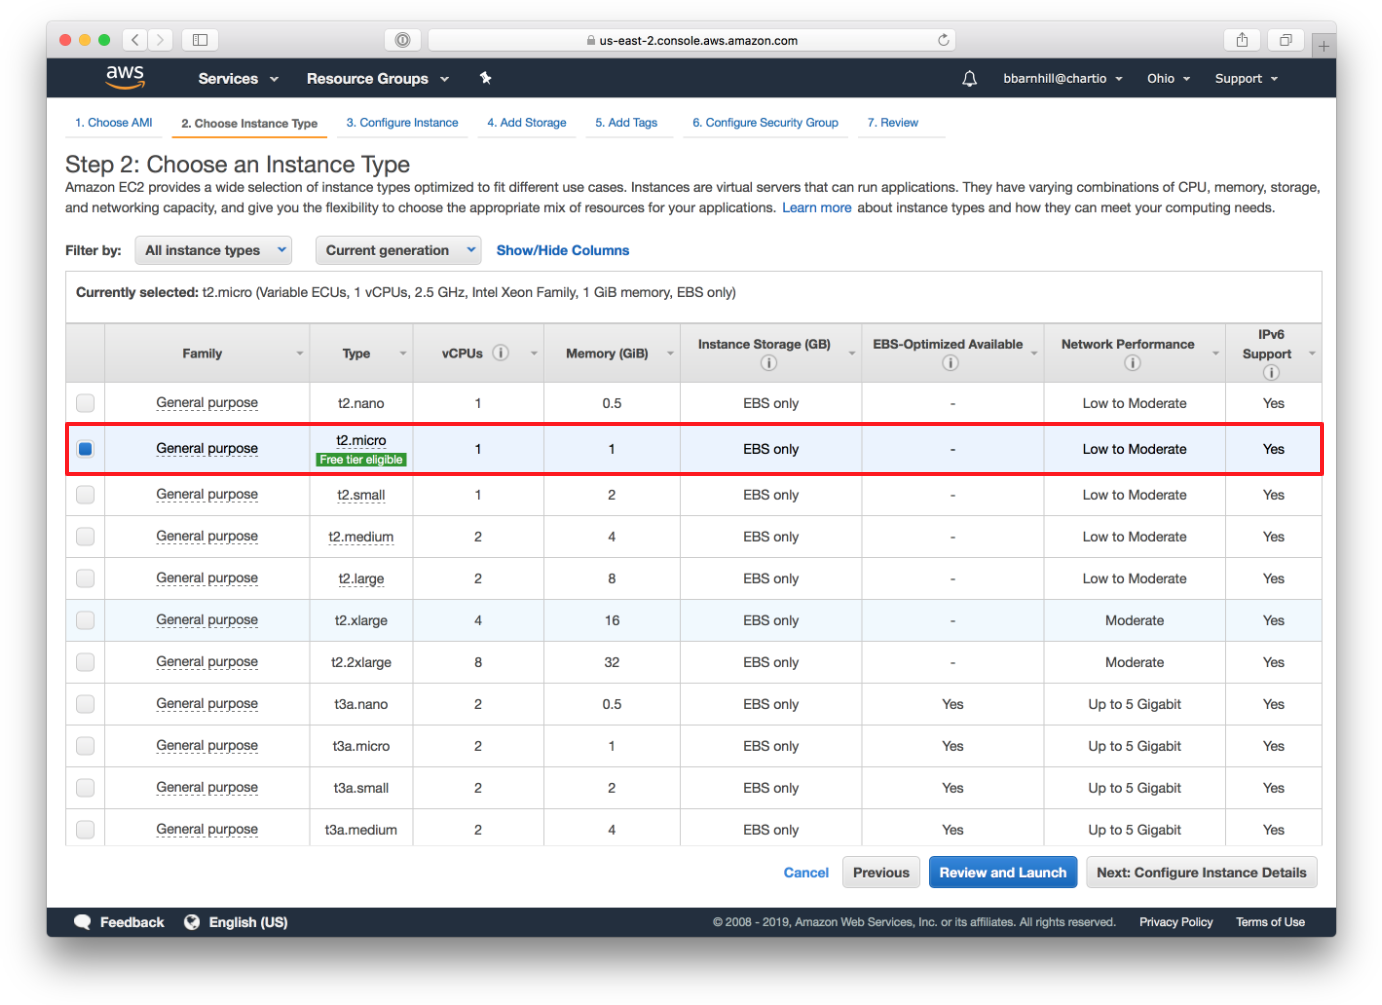
Step 4: Choosing an instance type
The instance type of your server will determine how much hardware is dedicated to your server. The more vCPUs and Memory, the faster your server will process requests. For this example we will be using the free “t2.micro” tier, providing 750 hours (which are the number of hours in a month) of uptime per month for your first year using AWS:
Step 5: Review and Launch
Unless you want to increase the capabilities of your EC2 server or provide more functionality, your basic EC2 instance is ready to launch:
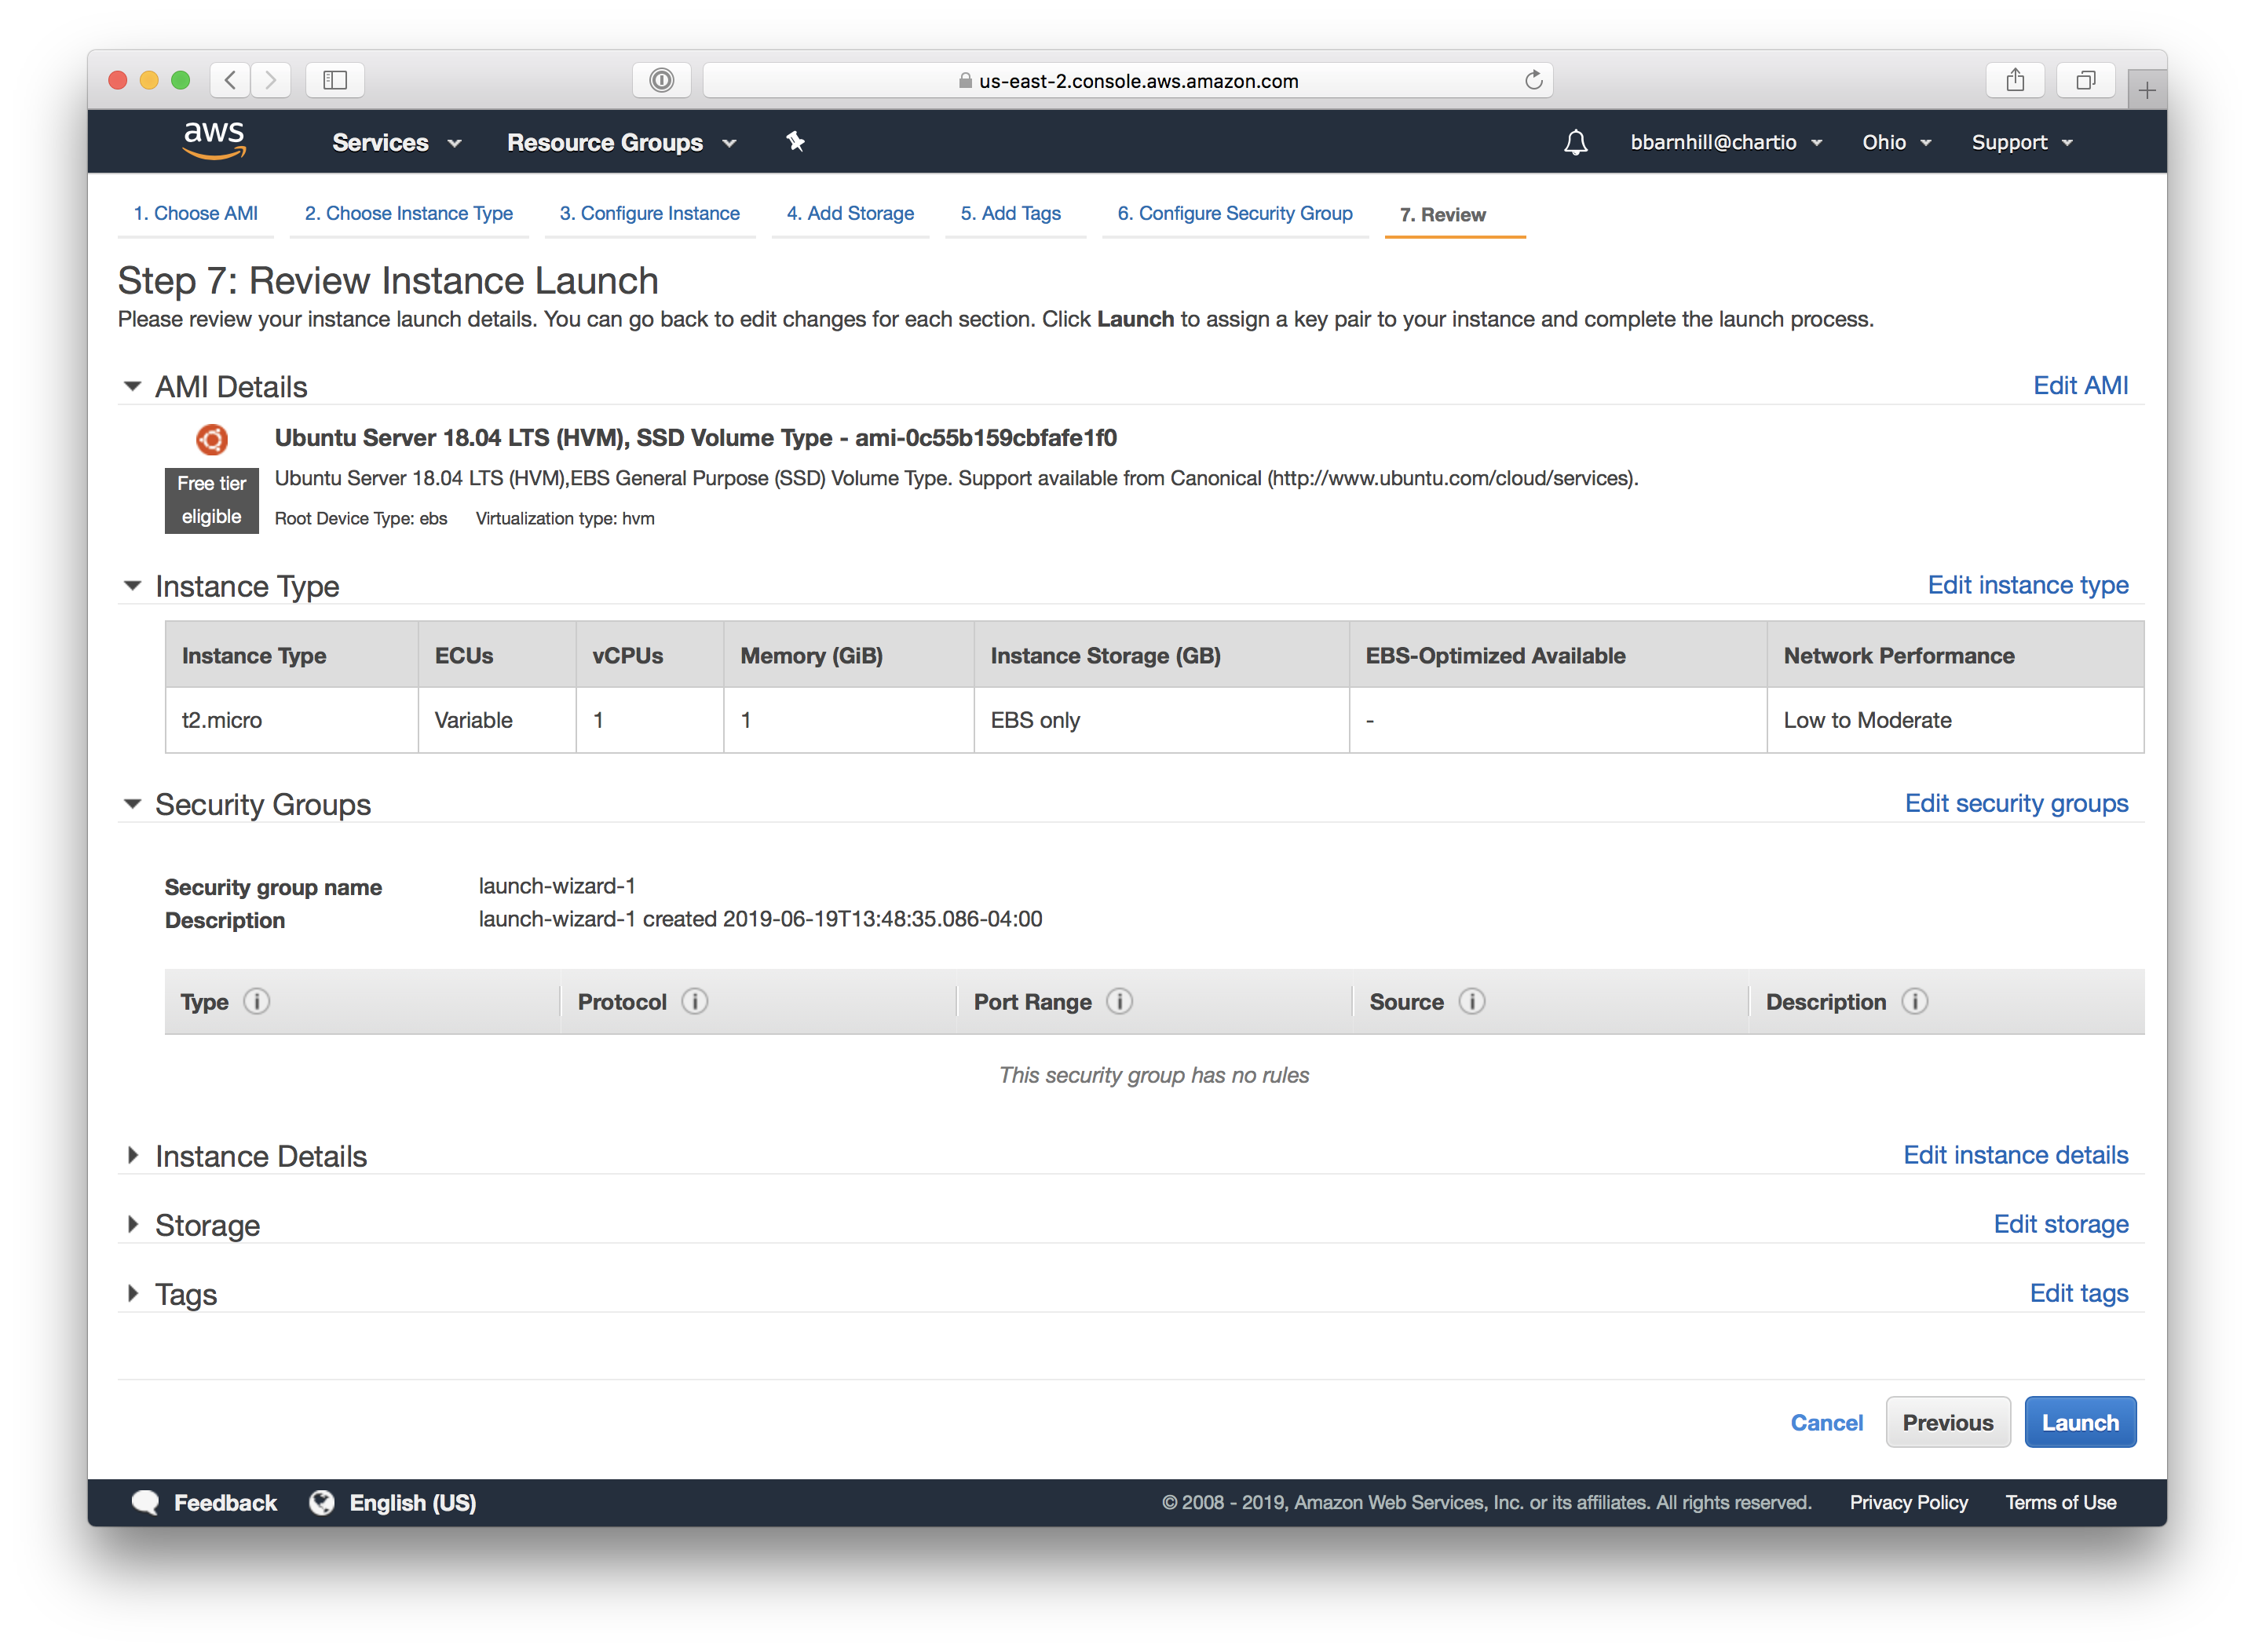
On this page you will notice that you can edit things:
- Security Groups - will allow you to determine who can access your server
- Storage - will determine how much data you can store on your server.
Once you have changed those to suit your needs click “Launch” on the bottom right hand corner of your browser.
Step 6: Creating an SSH key
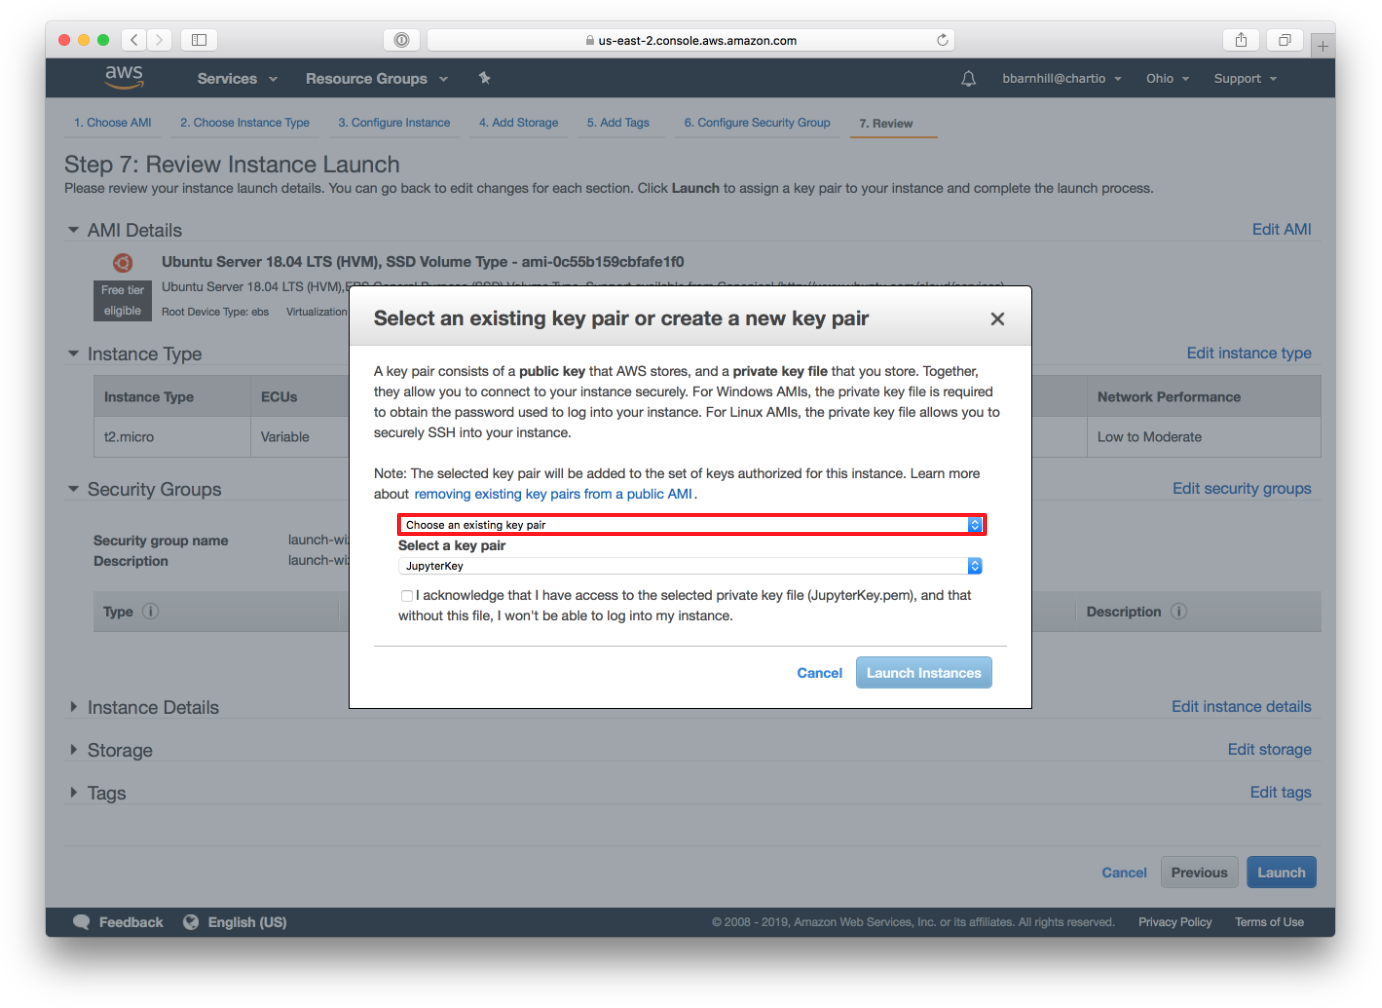
When prompted to create an SSH key, you must “Create a new key pair” and download the pair to finish creating your EC2 instance:
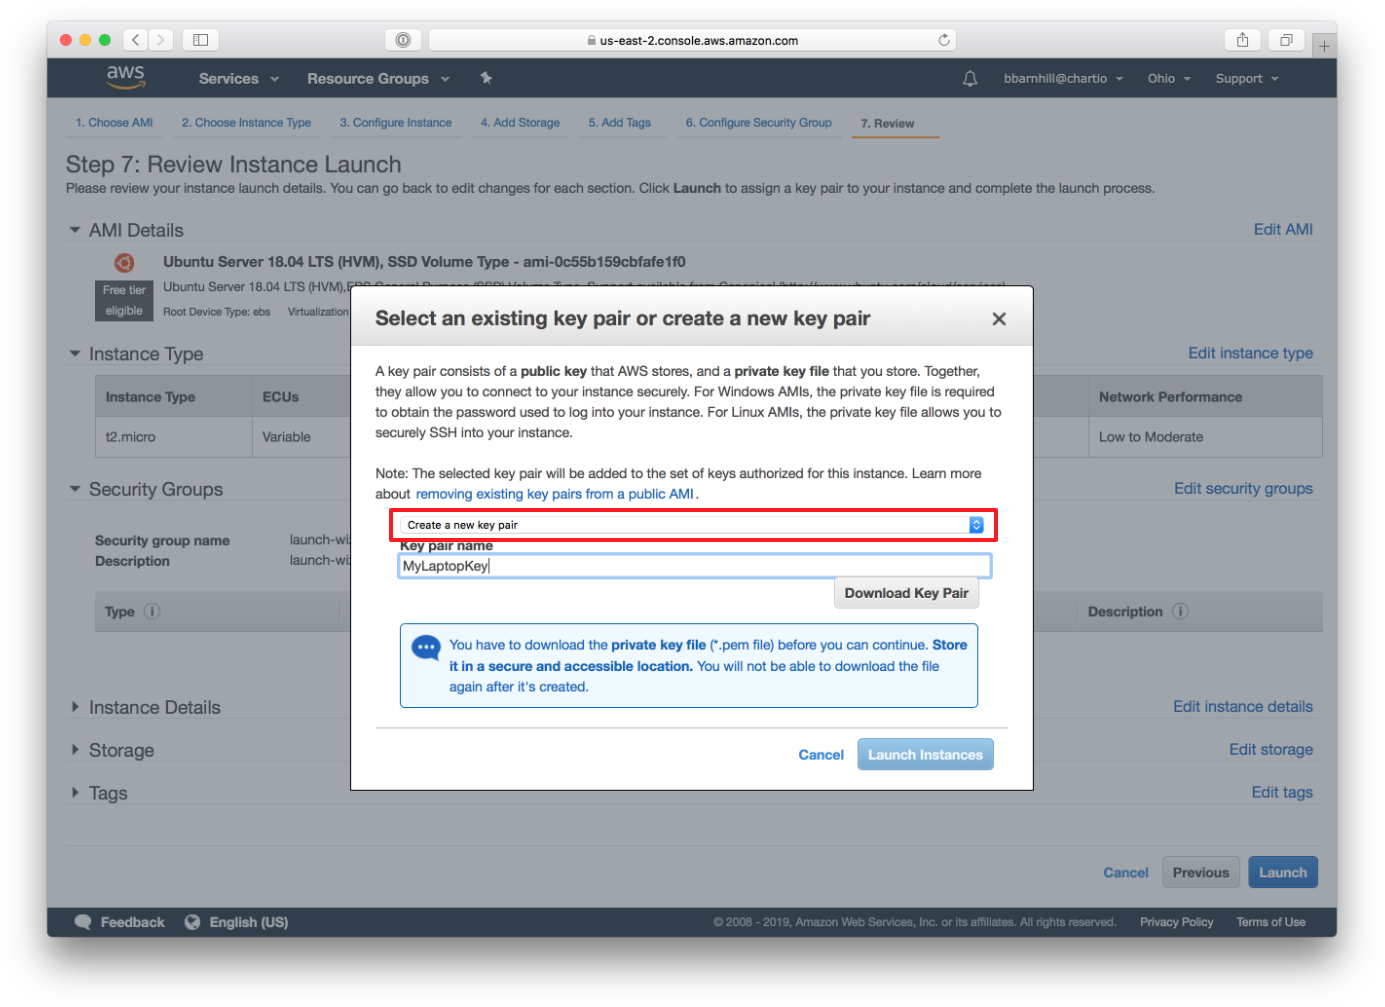
This SSH key pair will allow you to connect remotely to your server from the command line. In order to do this you may have to change the permissions for your key file. This can be done with:
Sudo chmod 400 /Path/Yourkey.pem
References:
https://docs.aws.amazon.com/efs/latest/ug/gs-step-one-create-ec2-resources.html
Written by:
Blake Barnhill
Reviewed by:
Matt David