Running Jupyter Notebook on an EC2 Server
Last modified: December 02, 2020
What is Jupyter?
Jupyter is an open-source application that allows you to create and share documents that contain live code, equations, visualizations and text. Jupyter can produce a variety of outputs, such as:
- HTML
- Images
- Videos
- LaTeX
- MIME(Multi-purpose Internet Mail Extensions)
Jupyter can be used to leverage big data tools and works with over 40 different languages.
How to use Jupyter
There are two ways to use Jupyter on your own computer:
- In the browser at Jupyter.org
- On your computer
- Two ways to install Jupyter to your computer, both can be found here.
These options work just fine for personal use but you can also install Jupyter onto an AWS server so that it can run be accessed from anywhere. To do so requires a little more work on the front end but allows you to access your Jupyter Notebook from any computer as long as you have a network connection.
Step 1: Create an EC2 Instance
Click here for our tutorial on creating an EC2 Server
Step 2: Customize your EC2 server for Jupyter
To run your Jupyter Notebook on your EC2 server, you are going to need to add a new security group. On the EC2 instance page go to the “Security Groups” section:
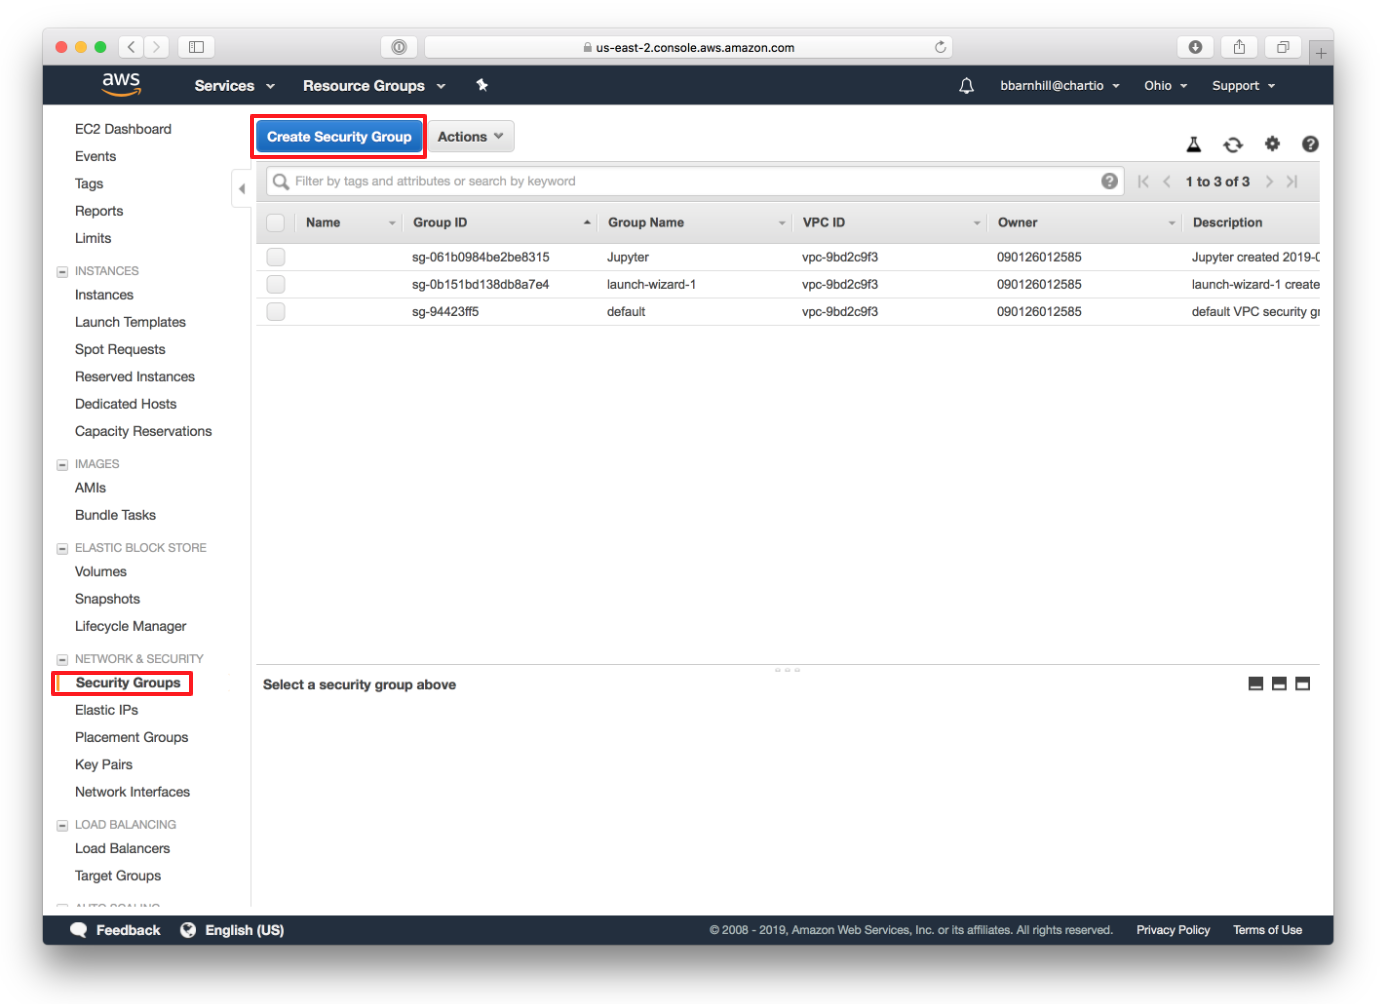
Here you need to create a new security group by clicking “Create Security Group” on the top of the page.
From there you need to give the group three properties:
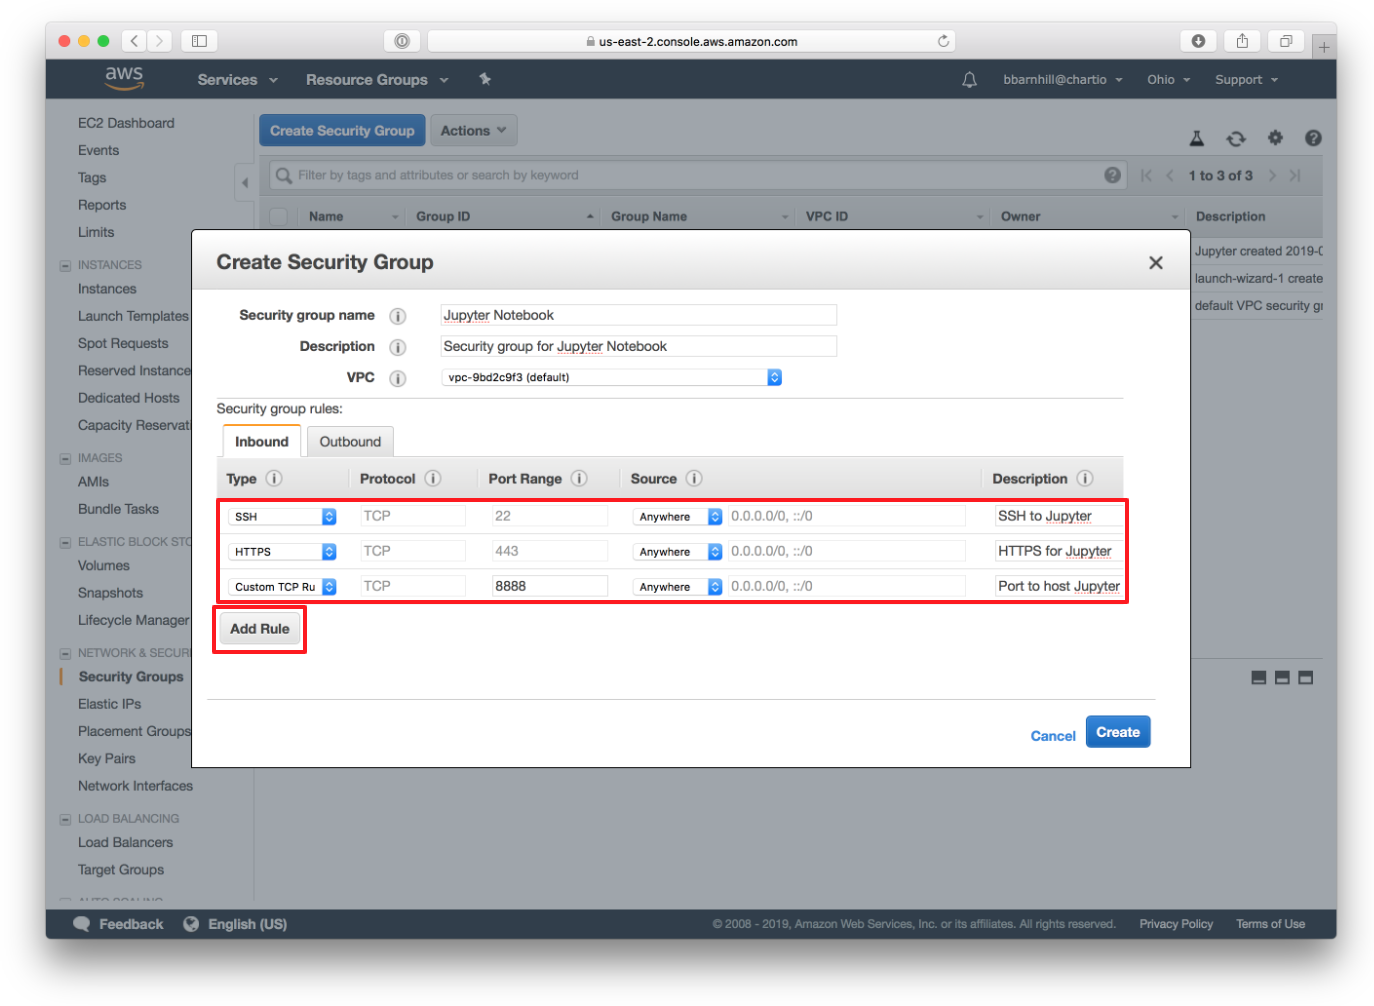
Use “Add Rule” to add new Security Group rules. You will need three new rules:
- The SSH rule will allow us to connect to the server via SSH.
- The HTTPS rule will allow us to connect the EC2 to a website.
- The Custom TCP rule determines which port to run the website on.
Setting the source to anywhere will allow you to access your Jupyter Notebook from any IP address. You can limit access by entering a custom IP into the source.
Once you have all of that set “Create” this new security group.
Next go back to the “Instances” tab:
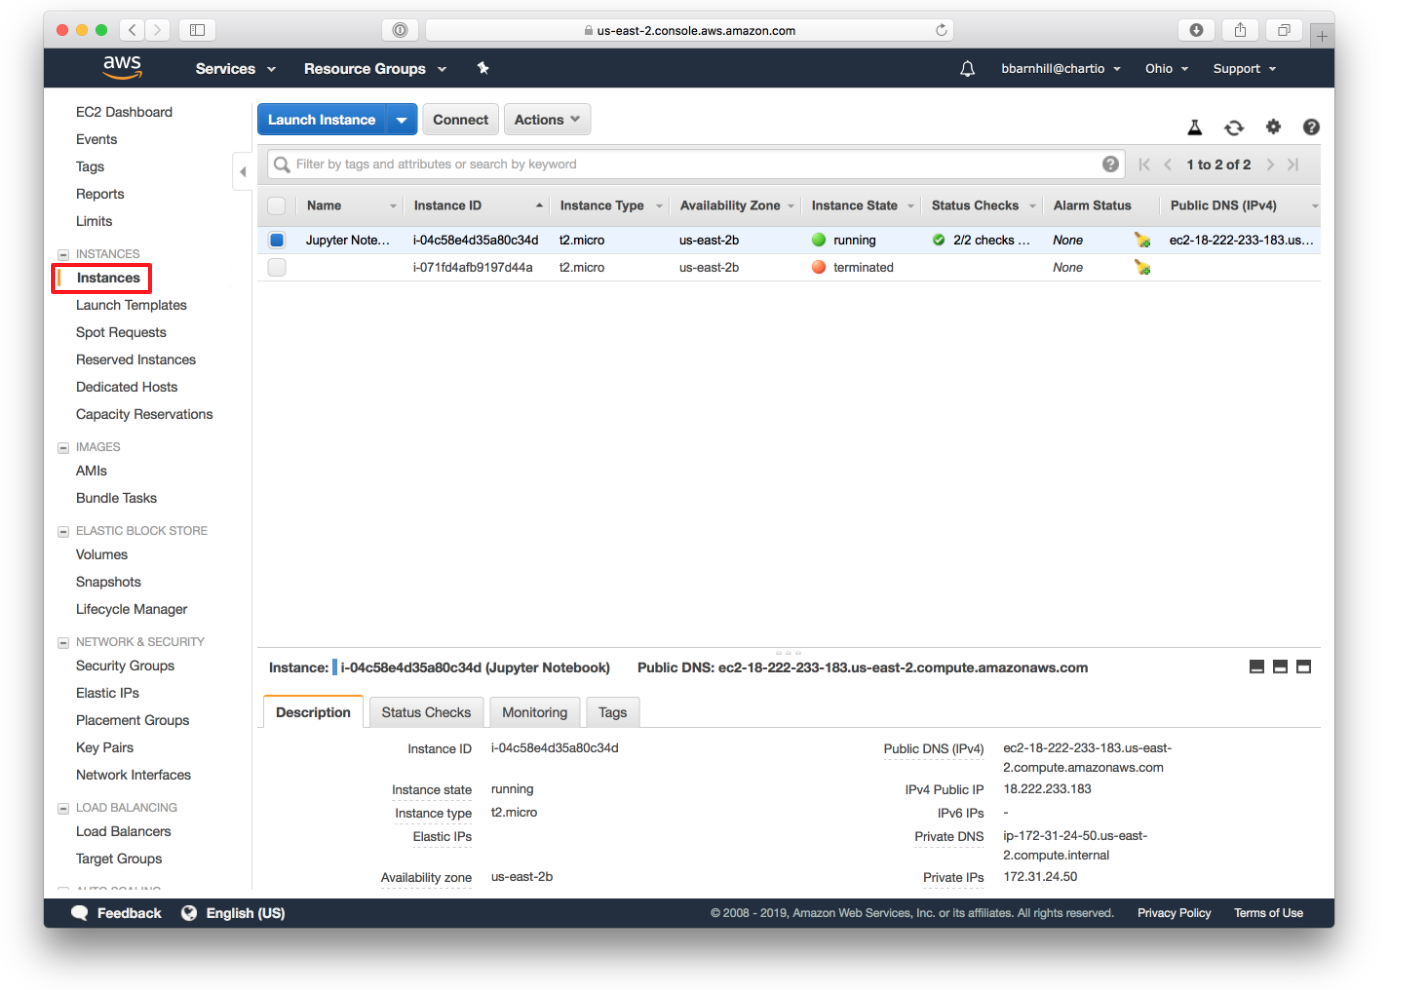
Select the EC2 instance you are going to be using for your Jupyter Notebook, go into “Actions”, “Networking” and click “Change Security Groups”:
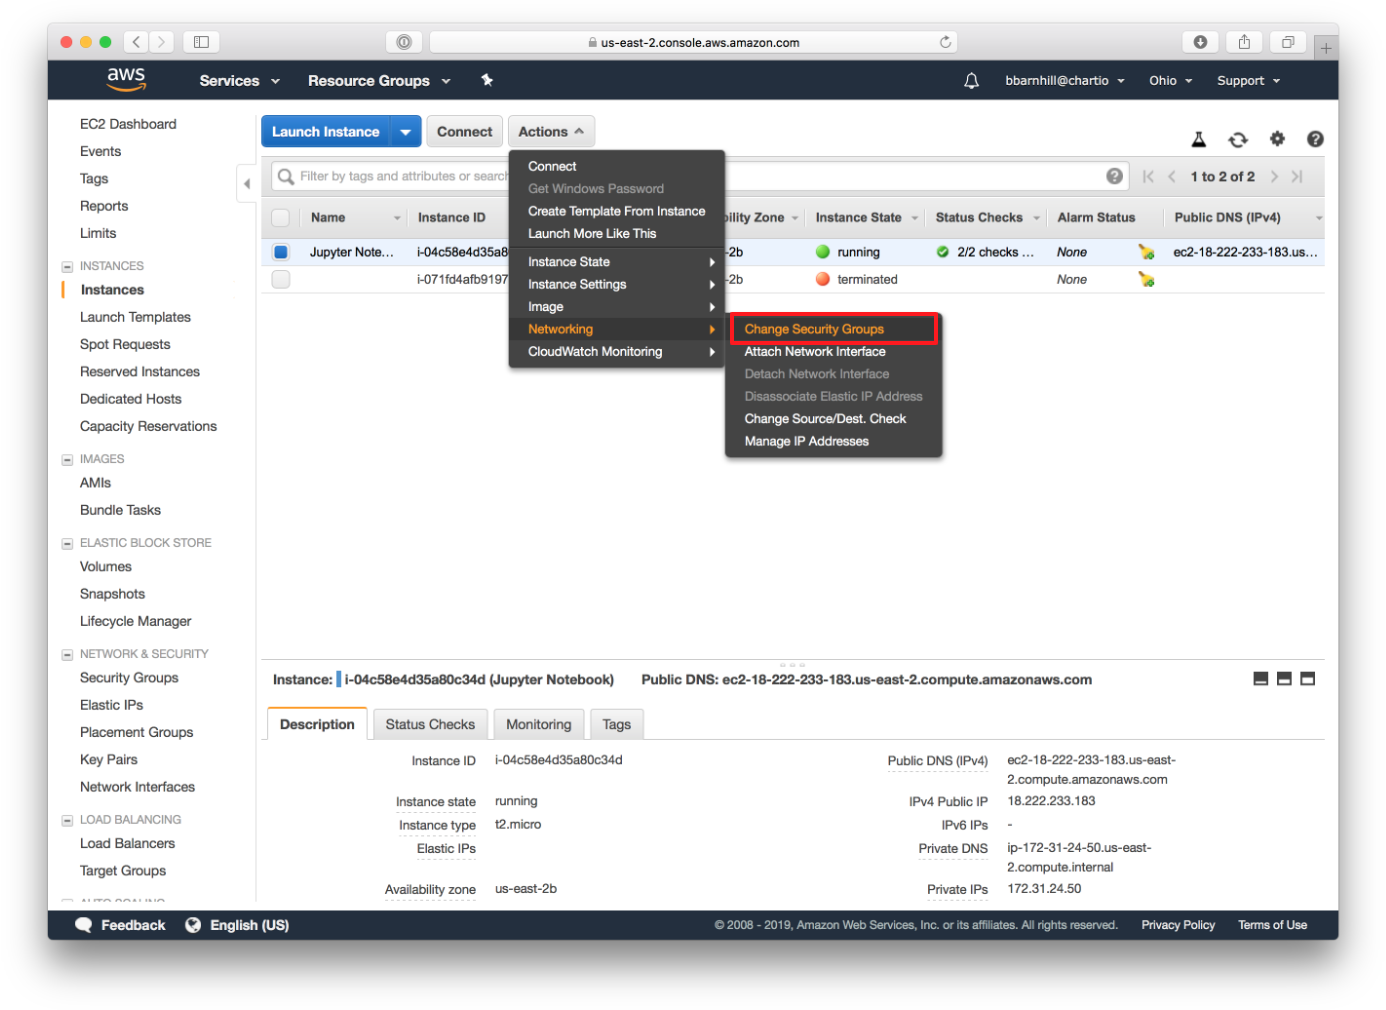
In this menu, select the security group that you just created and then click “Assign Security Group”:
Step 3: Connecting to your EC2
Before you begin, make sure you followed “Step 6” of the “Creating an EC2 Instance” article and changed the permissions for your .pem file.
sudo chmod 400 /path/YourKey.pem
By clicking “Connect” at the top of the instances page, Amazon will provide a list of instructions on connecting to your EC2 server:
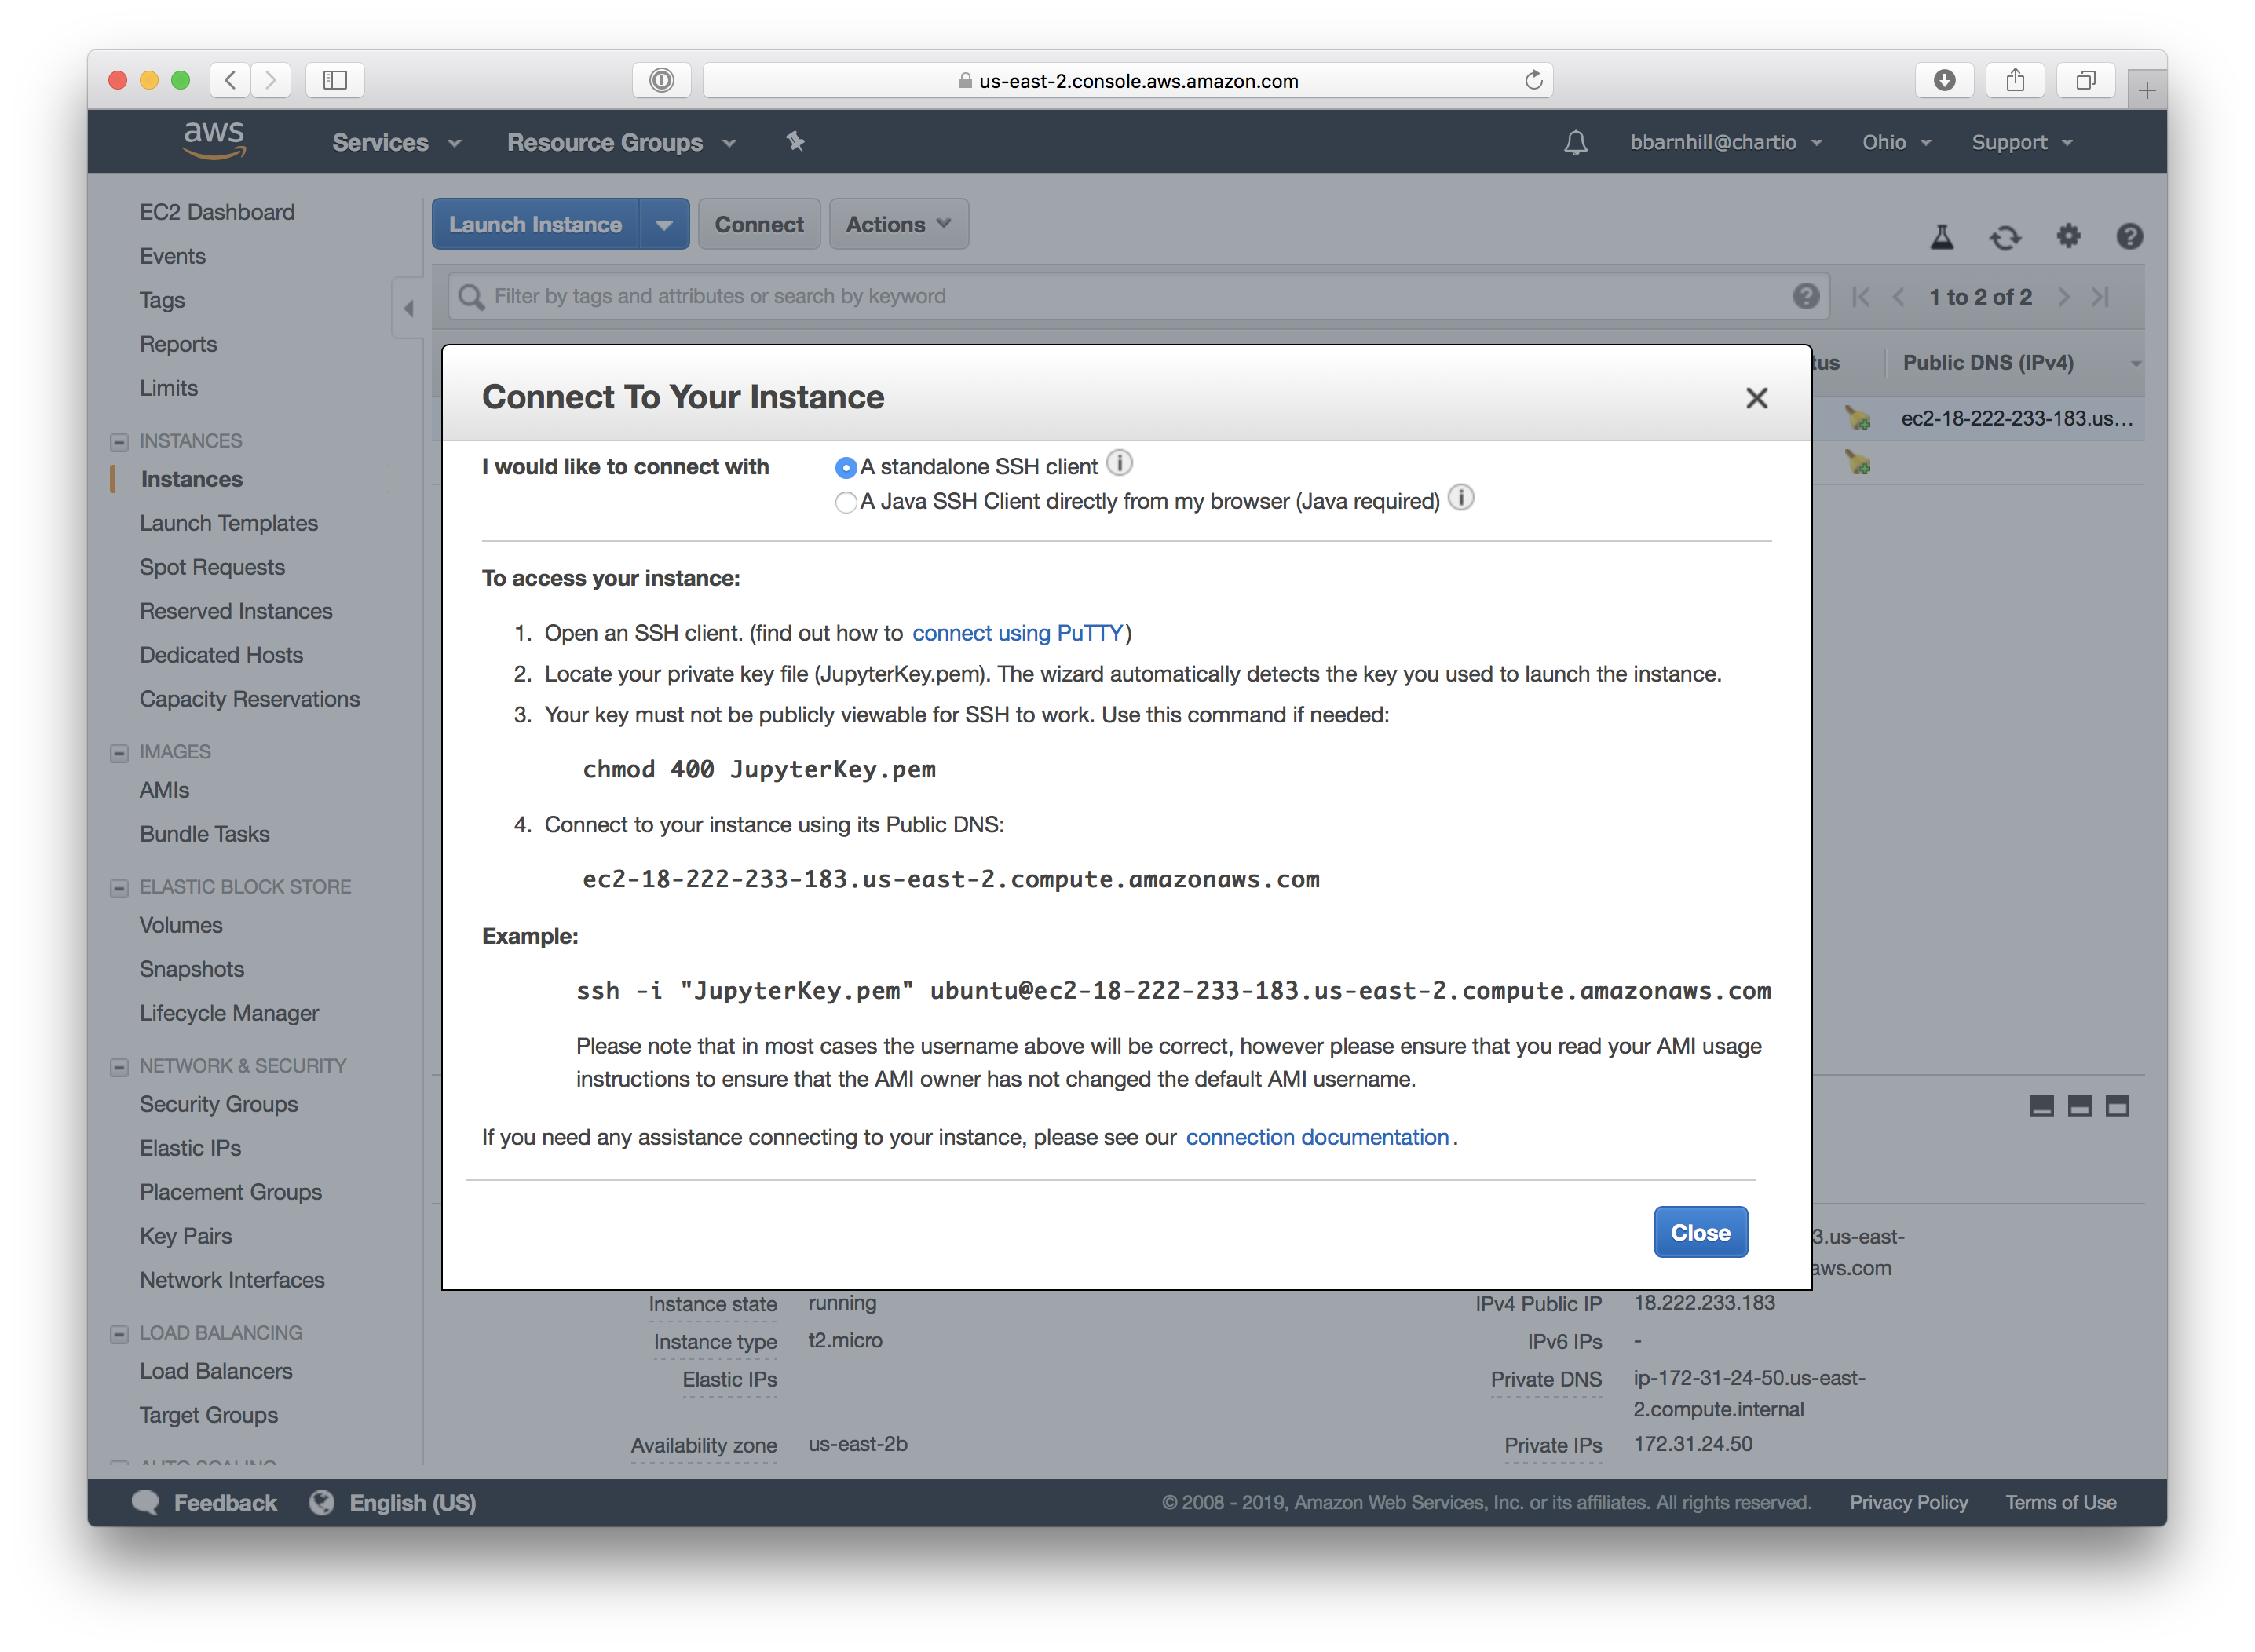
Note: you will need to have an SSH client on your computer. All Macbooks come with SSH, Window users may have to install an SSH client. On you command line you can check if you have an SSH client by typing “SSH” and hitting enter and checking if your terminal recognizes the command.
You should be able to connect to your instance by copying the “Example” from the “Connect” tab. If you get an error about not being able to find the Permission File you may have to specify the path to the file. Move information on connect VIA SSH can be found here on Amazon’s help site.
You should be greeted with a message:
“Welcome to Ubuntu 18.04.2 LTS” or whatever Operating System you installed.

Step 4: Installing Jupyter Notebook
Once you are connected to your EC2, you now need to install Jupyter. The easiest way to do this is to download the Anaconda distribution that matches your Operating System (if you are following along using Ubuntu, this is the Linux version).
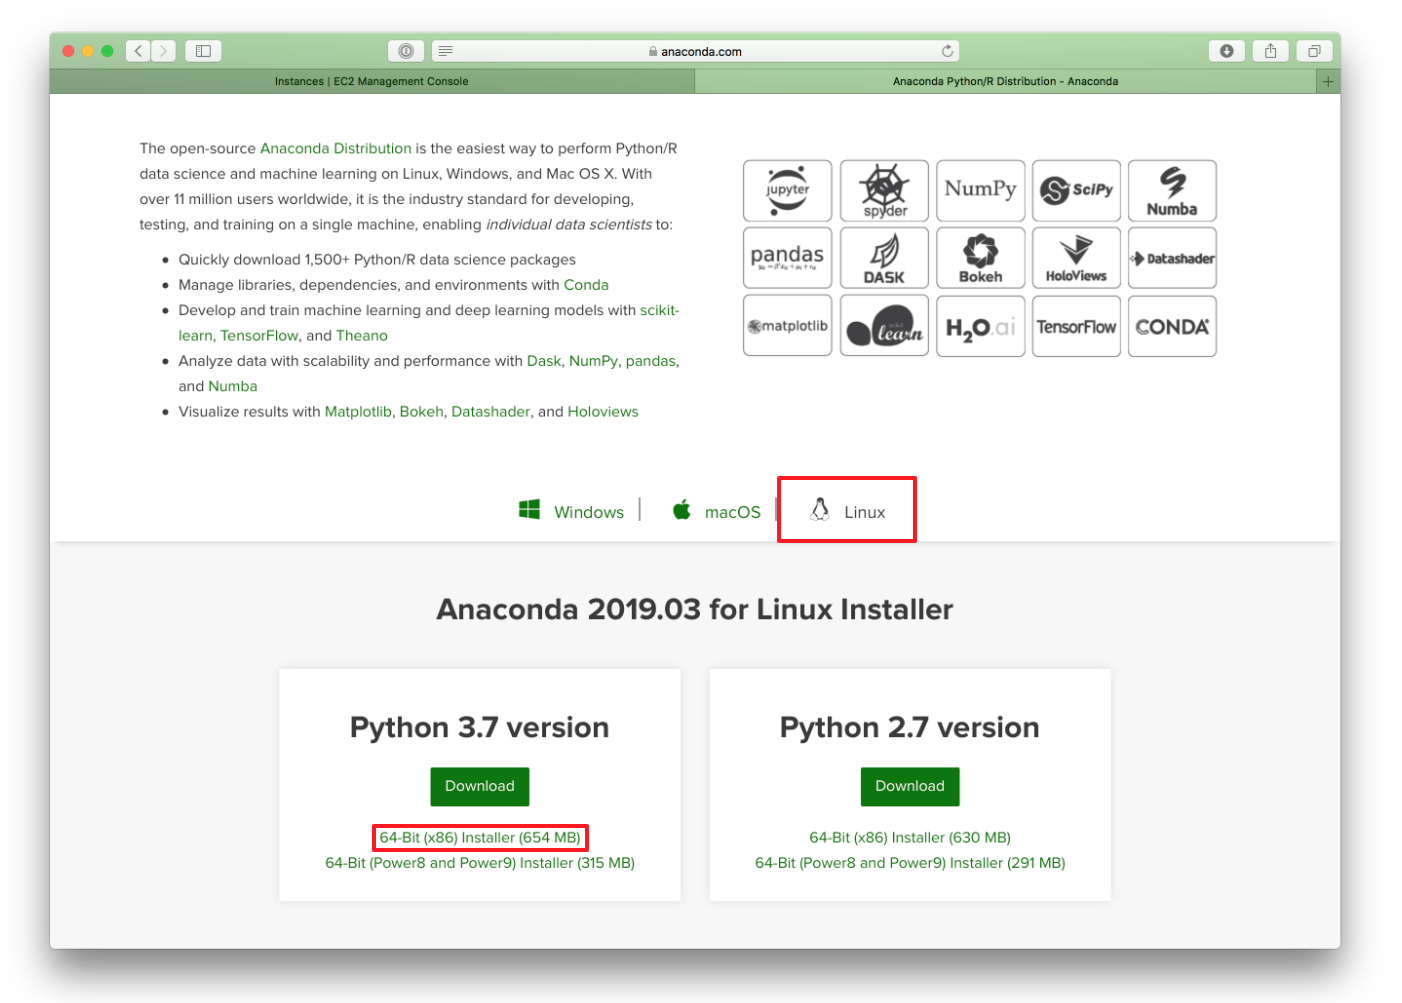
To download the Anaconda distribution to your EC2, copy the “installer” link and run:
wget https://repo.anaconda.com/archive/Anaconda3-2019.03-Linux-x86_64.sh
(this is the latest version as of writing this article)
Once the file is downloaded run bash on the file that was downloaded to install it:
bash Anaconda3-2019.03-Linux-x86_64.sh
Step 5: Configuring Jupyter Notebook’s Path
First, we need to add Jupyter to the system’s path (you can check if it is already on the path by running: which python, if no path is returned you need to add the path) To add Jupyter functionality to your terminal, add the following line of code to your .bashrc file:
export PATH=/home/ubuntu/anaconda3/bin:$PATH
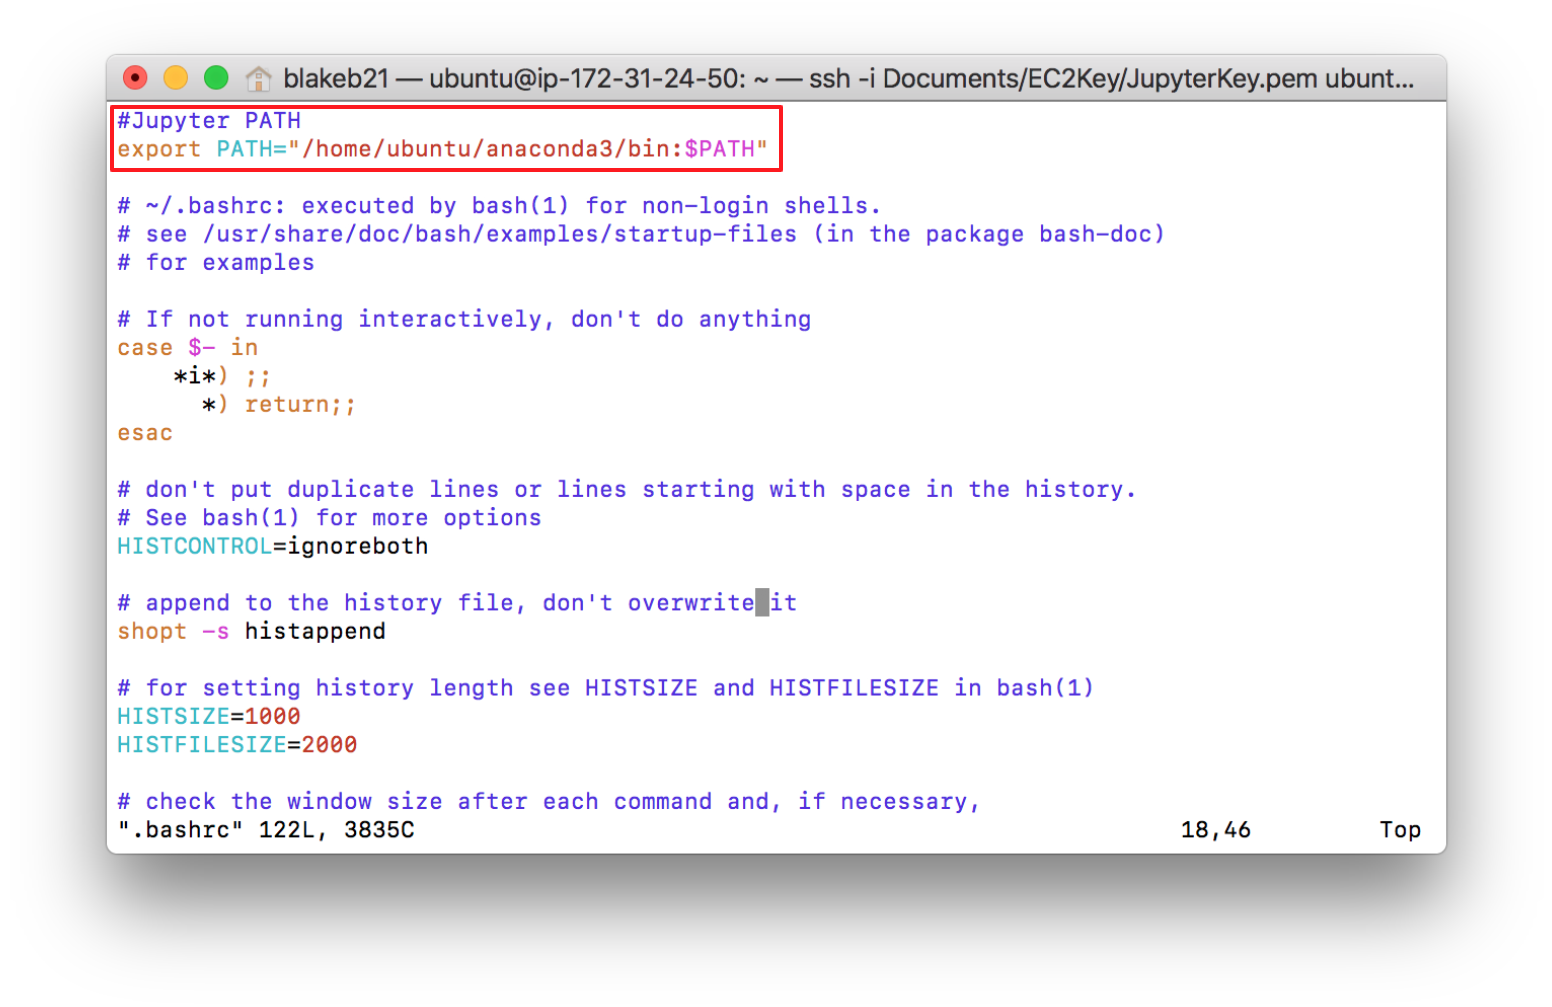
After saving this change, you now need to run:
source .bashrc
To cause these changes to take effect. Now running which python should return the path to the python folder in Anaconda.
Step 6: Configuring Jupyter Notebook settings
First, you need to create our Jupyter configuration file. In order to create that file, you need to run:
jupyter notebook --generate-config
After creating your configuration file, you will need to generate a password for your Jupyter Notebook using ipython:
Enter the IPython command line:
ipython
Now follow these steps to generate your password:
from IPython.lib import passwd
passwd()
You will be prompted to enter and re-enter your password. IPython will then generate a hash output, COPY THIS AND SAVE IT FOR LATER. We will need this for our configuration file.
Next go into your jupyter config file:
cd .jupyter
vim jupyter_notebook_config.py_
Note: You may need first to run “exit” in order to exit IPython otherwise the vim command may not be recognized by the terminal.
And add the following code:
conf = get_config()

conf.NotebookApp.ip = '0.0.0.0'
conf.NotebookApp.password = u'YOUR PASSWORD HASH'
conf.NotebookApp.port = 8888
Note: this code below should be put at the beginning of the document.
Tips:
- press “i” for insert mode
- press “esc” to escape
- press “shift+ z” to exit doc
Step 7: Create a directory for your notebooks
This step is easy. In order to make a folder to store all of your Jupyter Notebooks simply run:
mkdir MyNotebooks
You can call this folder anything, for this example we call it “MyNotebooks”
Step 8: Connecting to your EC2 Jupyter Server
After Step 7, you should be ready to run your notebook and access your EC2 server. To run your Notebook simply run the command:
jupyter notebook
From there you should be able to access your server by going to:
https://(your AWS public dns):8888/
For example it should look like:
http://ec2-18-222-233-183.us-east-2.compute.amazonaws.com:8888/
You should be brought to a page like this:
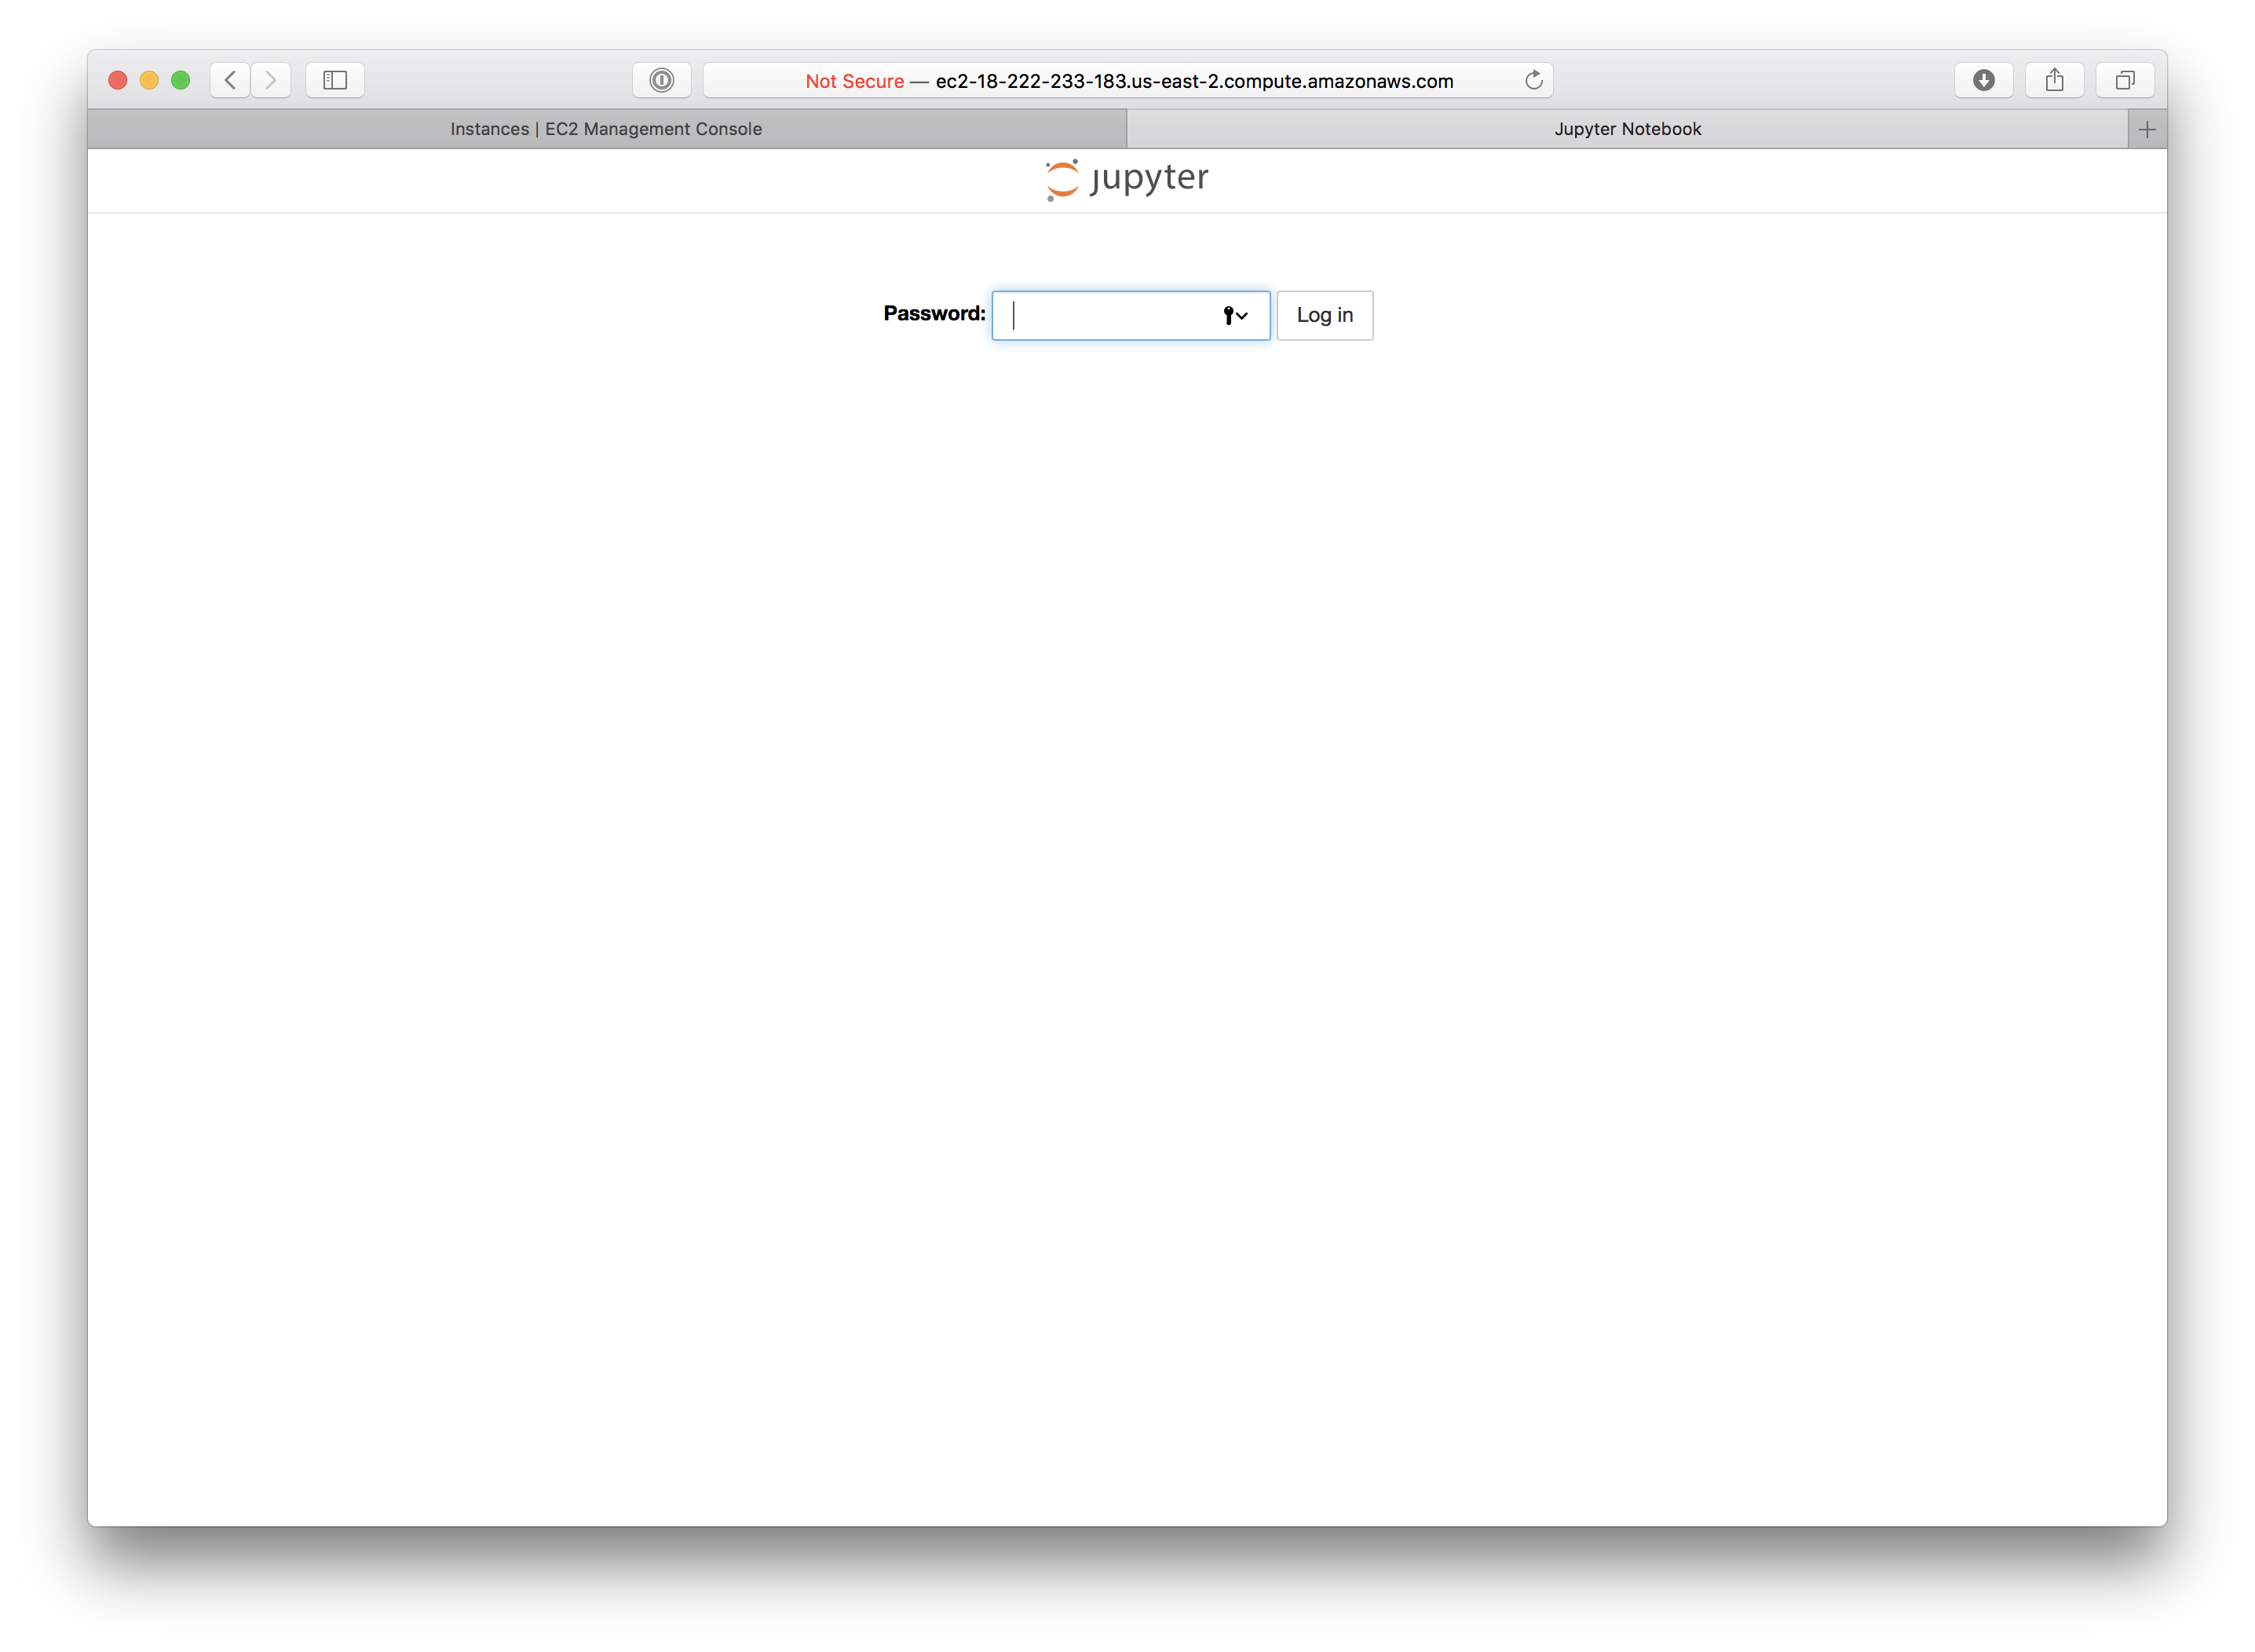
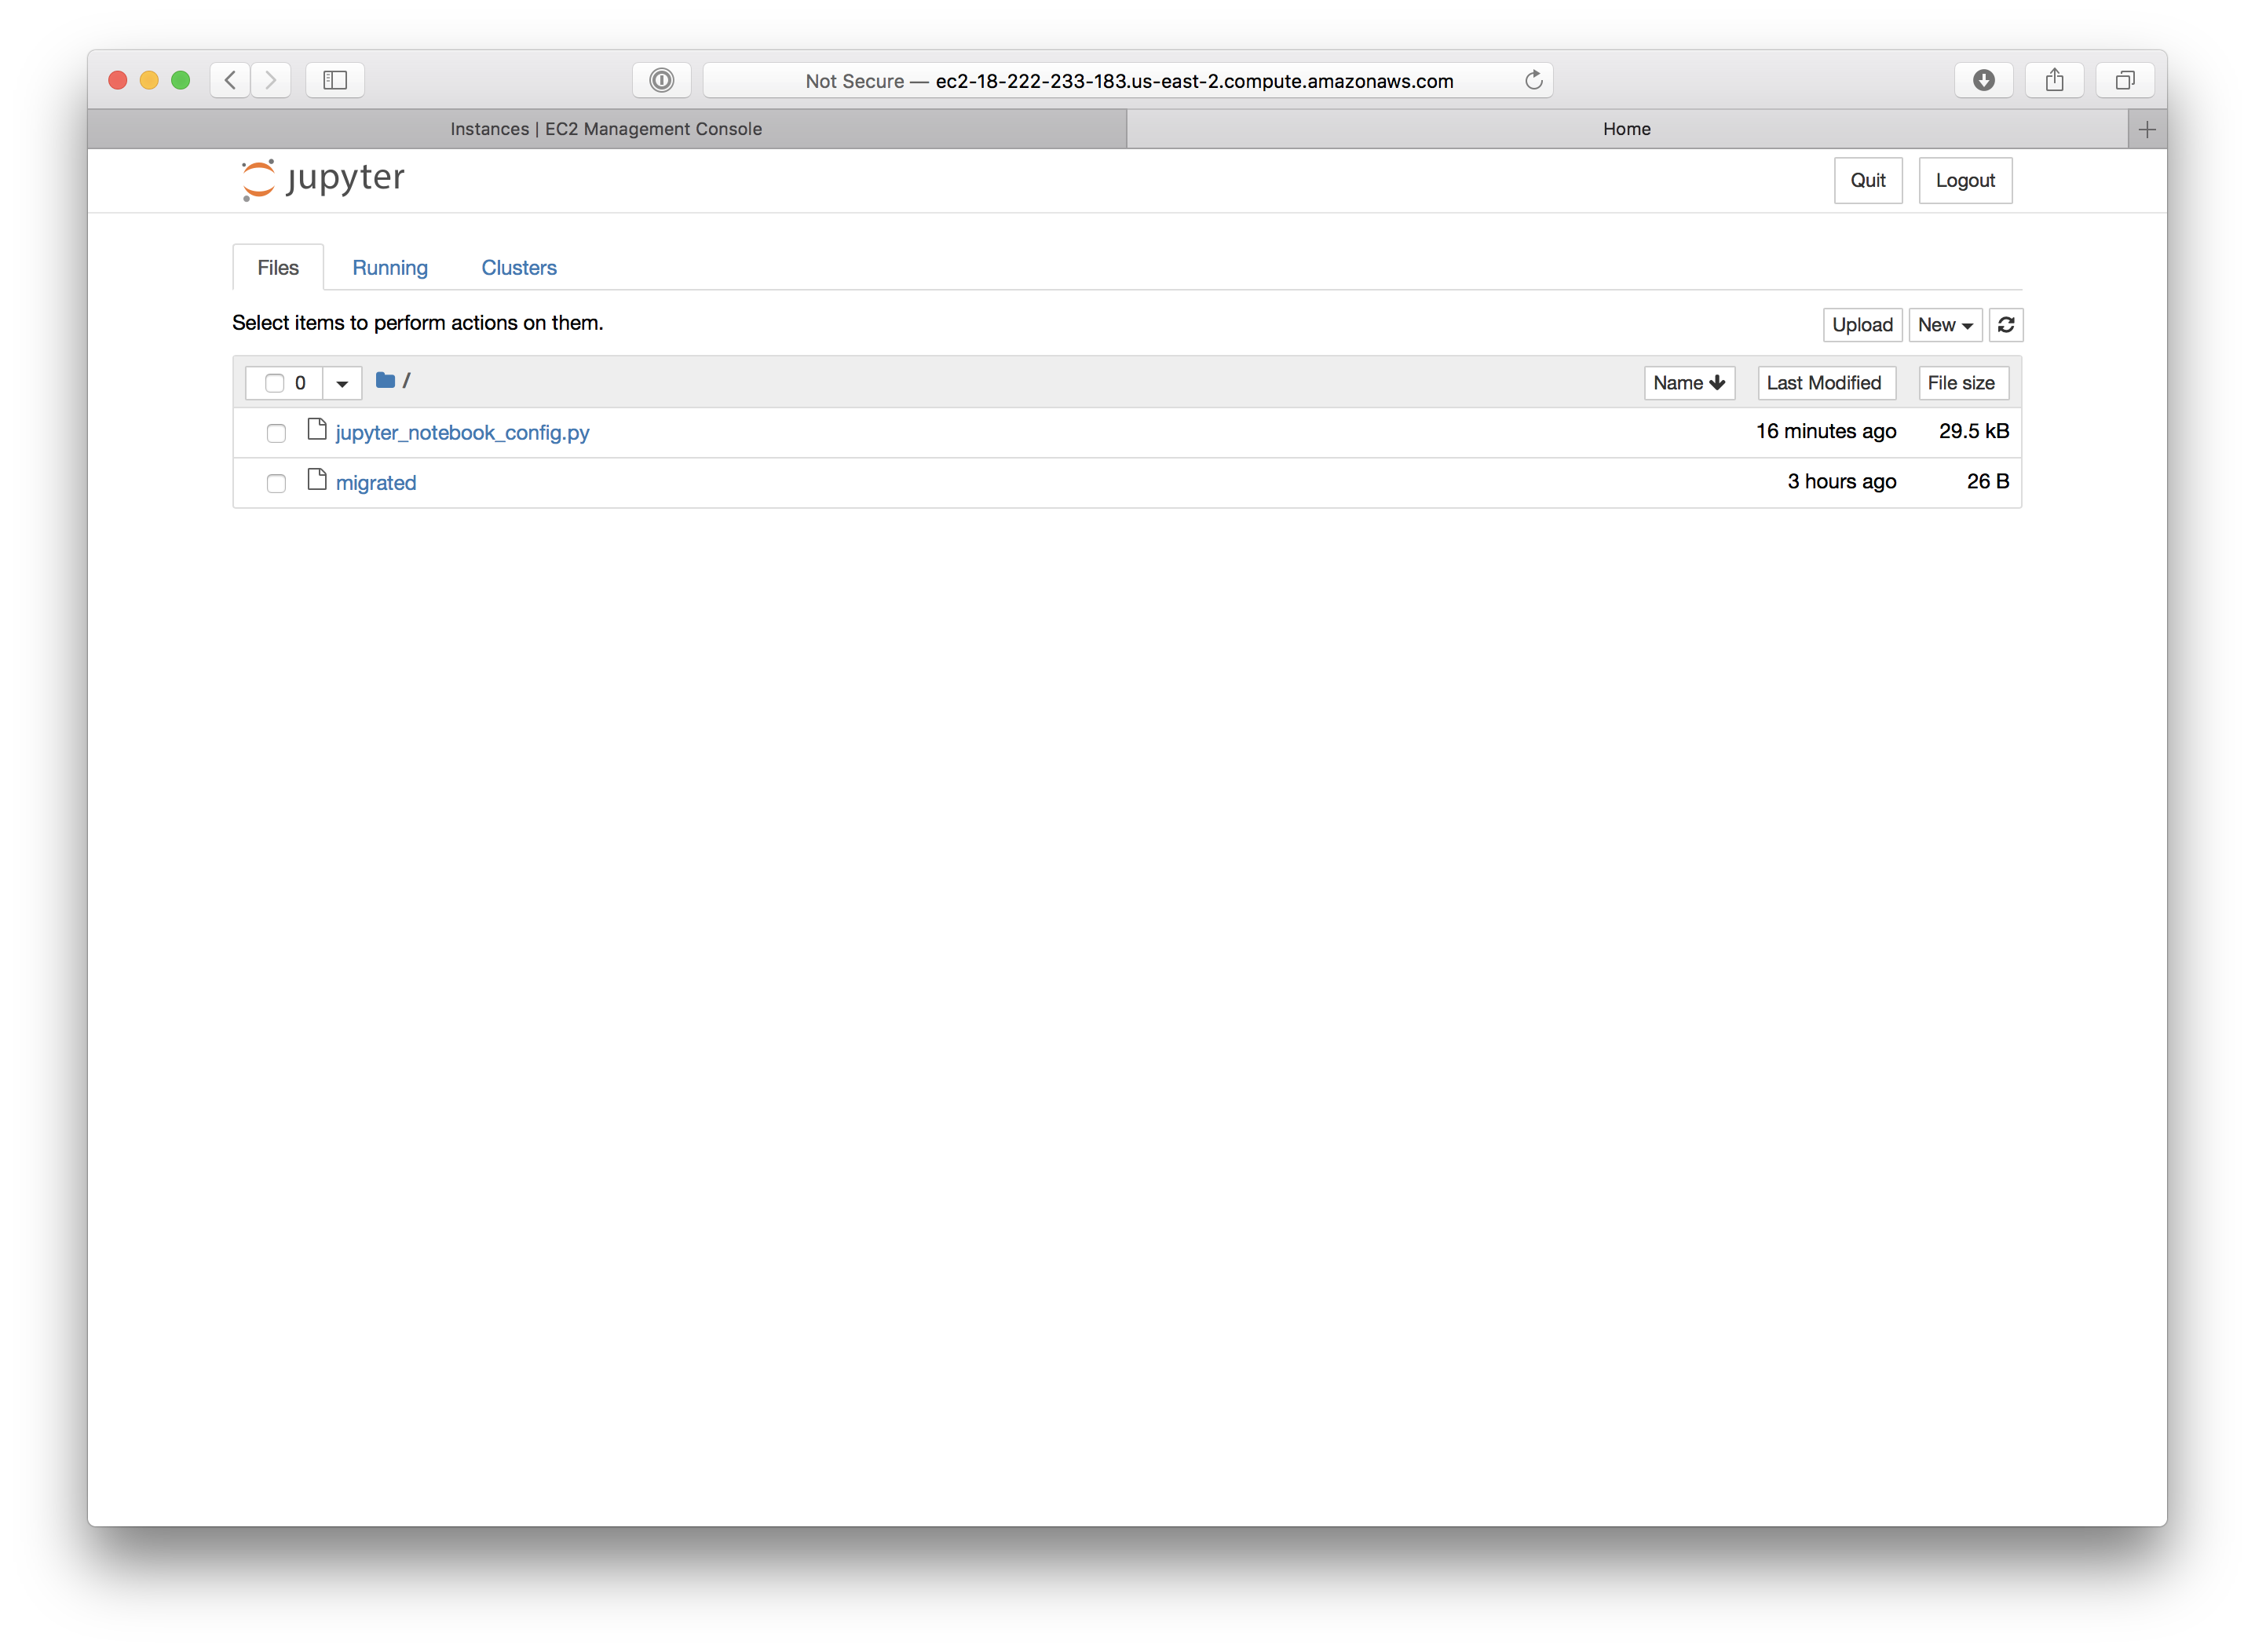
Enter the password you created and you should be greeted with your full Jupyter Notebook system:
References:
https://jupyter.org/ https://docs.aws.amazon.com/AWSEC2/latest/UserGuide/AccessingInstances.html?icmpid=docs_ec2_console
Written by:
Blake Barnhill
Reviewed by:
Matthew Layne
,
Matt David