

How to start a PostgreSQL server on Mac OS X
Last modified: December 09, 2019
There are two main ways to install PostgreSQL on mac OS X.
Using Homebrew
Homebrew can be installed by running the following command in a terminal:
/usr/bin/ruby -e "$(curl -fsSL https://raw.githubusercontent.com/Homebrew/install/master/install)"If Homebrew is already installed, make sure that it is up to date by running:
brew updateThen ensure there are no conflicts or errors using:
brew doctorHomebrew is a powerful package manager with many uses, including installing and running postgreSQL. This can be done by typing the following command into a terminal:
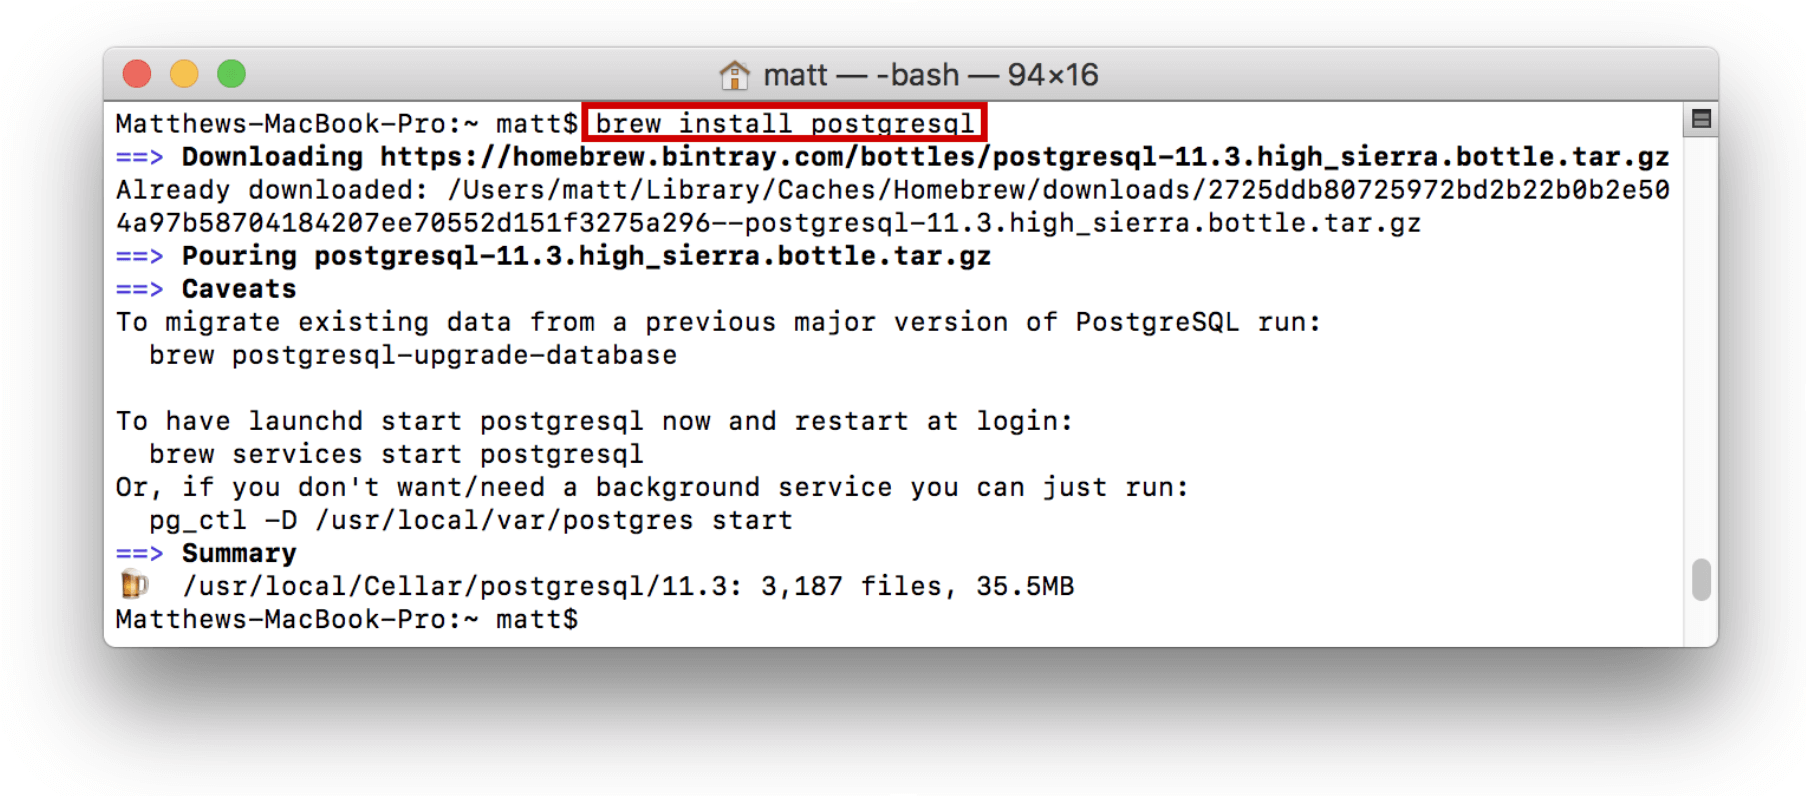
Now that postgres is installed the default server can be started by running the command:
pg_ctl -D /usr/local/var/postgres startThis will start up a postgres server hosted locally on port 5432. The server will be run out of the directory /usr/local/var/postgres.
It can now be accessed by typing the following command:
psql postgresThis will connect to the server and access the postgres database. Once this is done:
- Schemas and tables can be created
- Data can be loaded and deleted from the database
Queries can be run
The process should look like this:
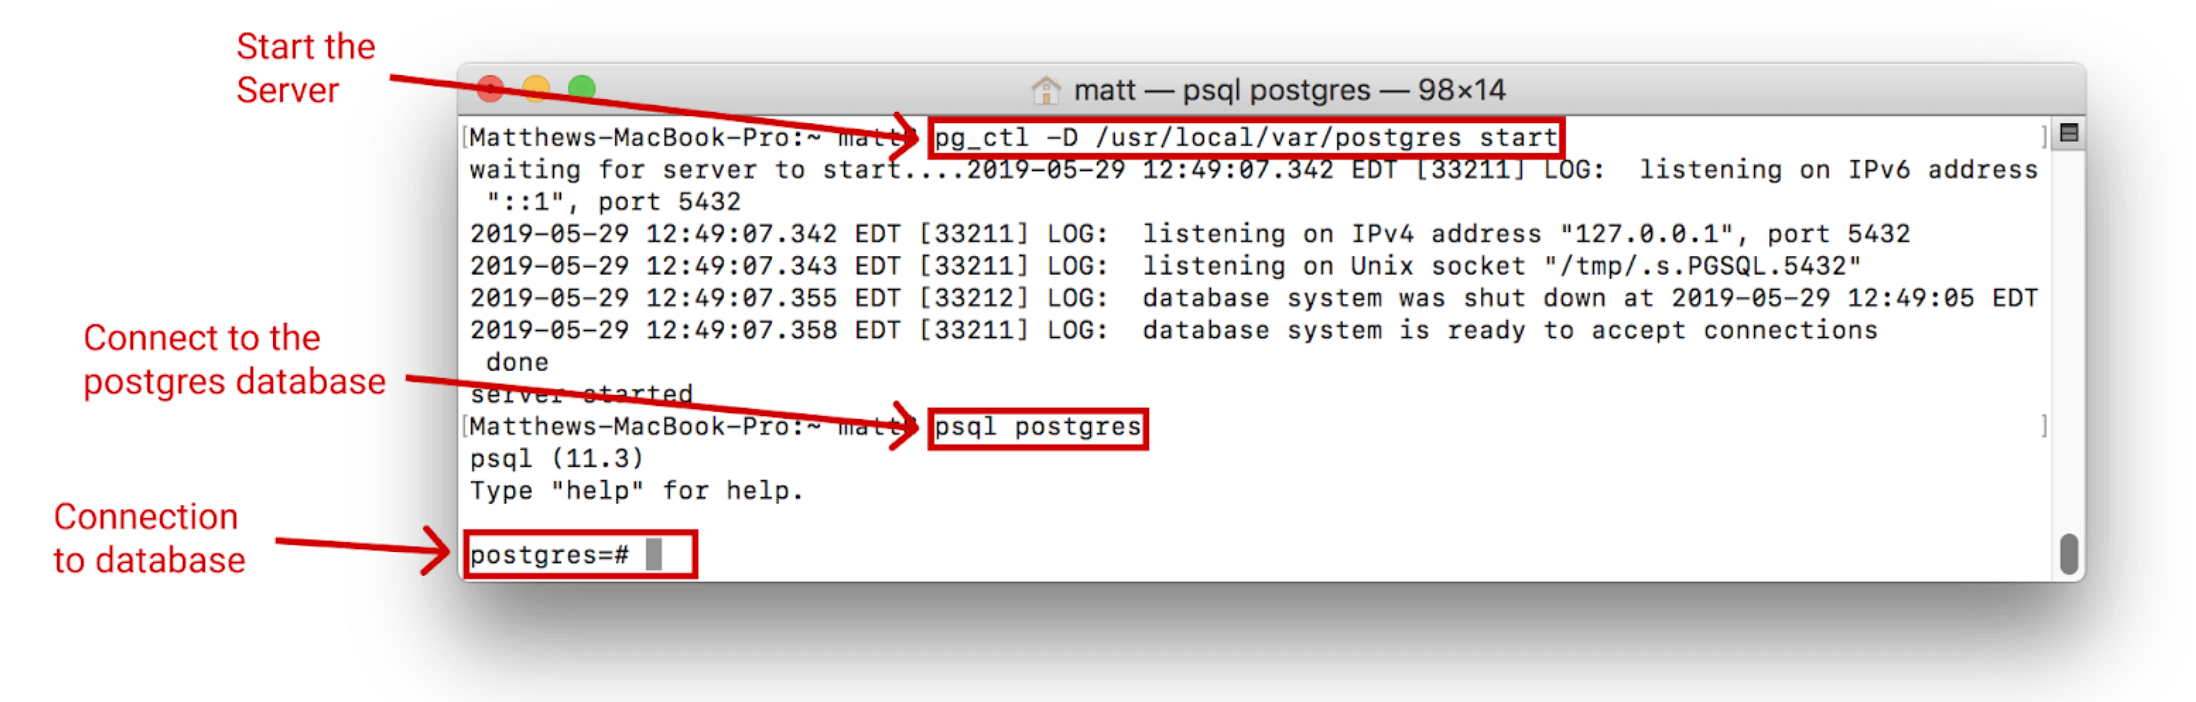
This shows that the server has been started and can be connected to.
(Optional) Creating a Custom Data Directory
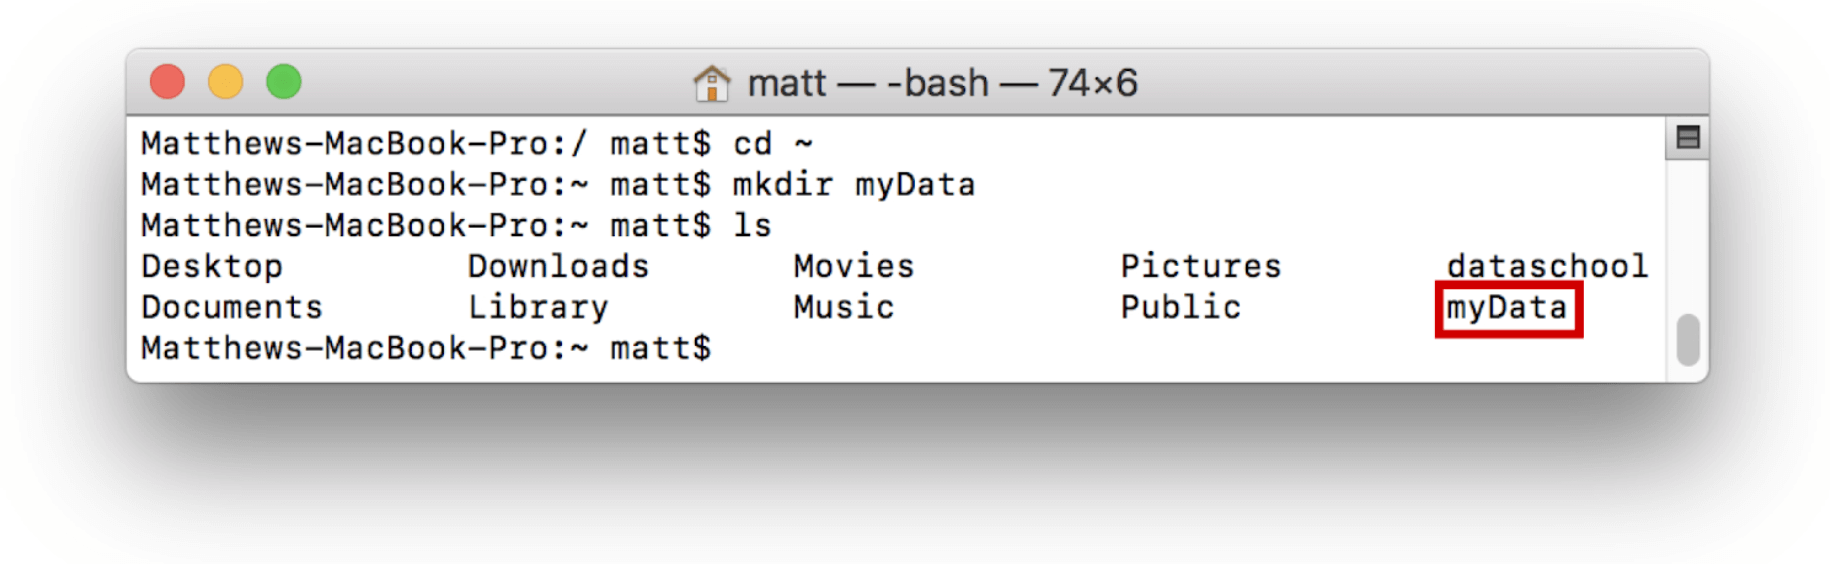
A custom data directory can also be used for a server. To do this, first create a directory to be used as the server location. For example, create a directory called myData in the home directory:
Once the directory is created, the server can be initialized. This means that we configure the directory and add the necessary files to run the server. To do this run the initdb command as shown:
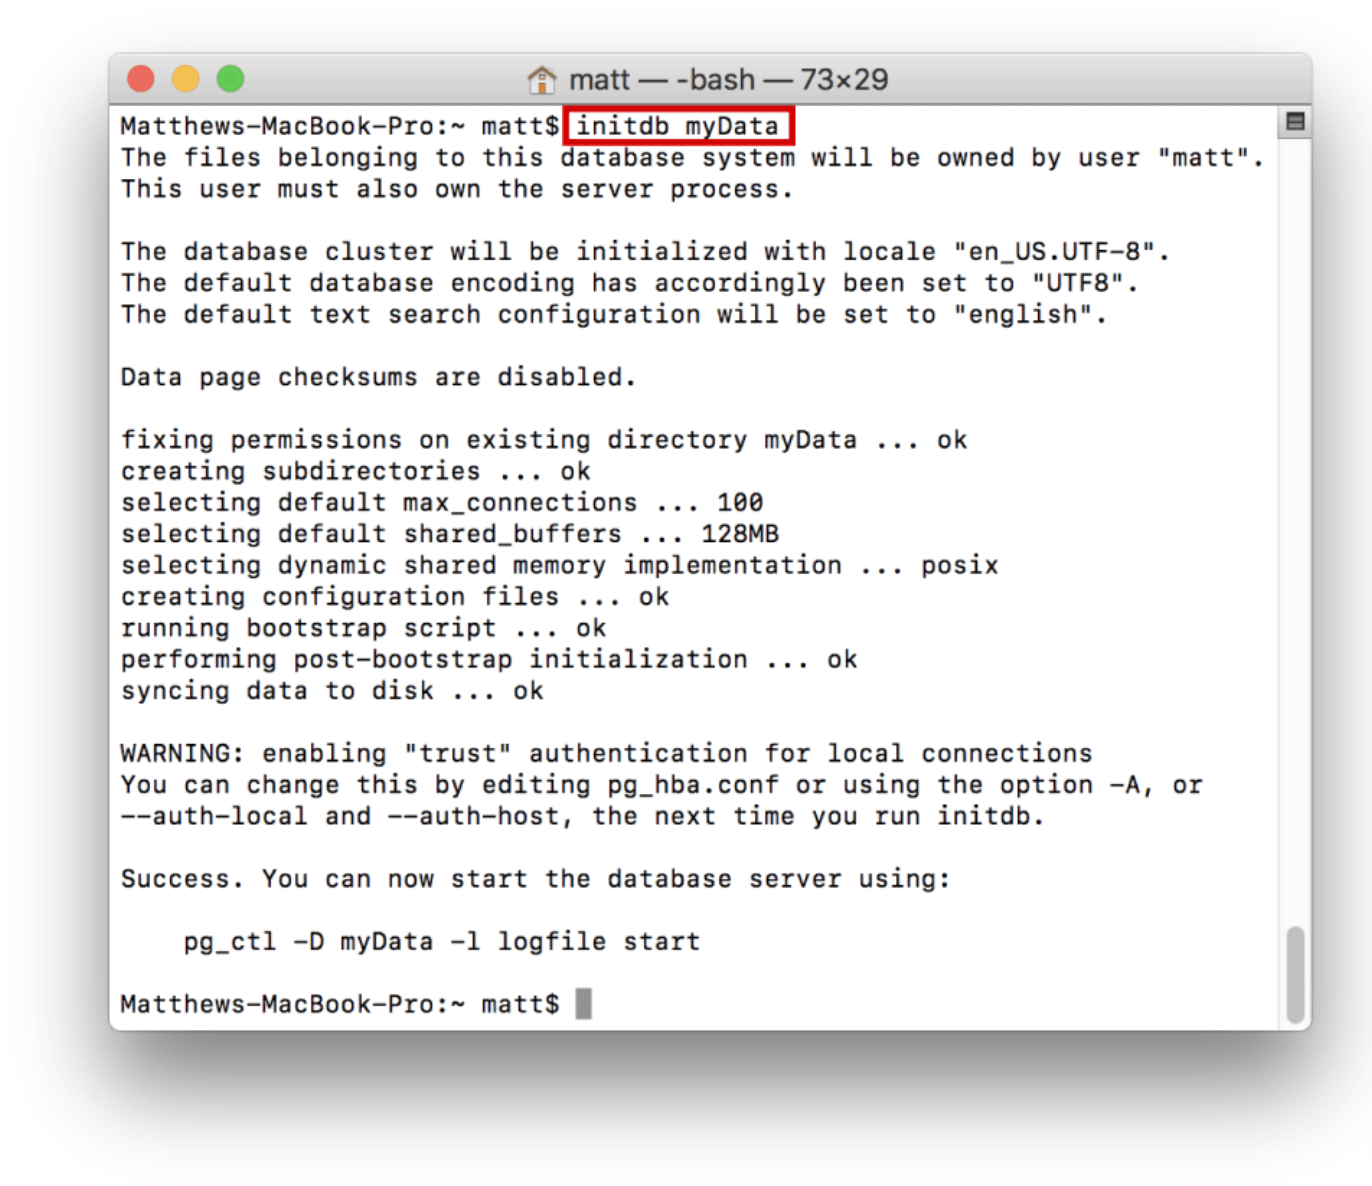
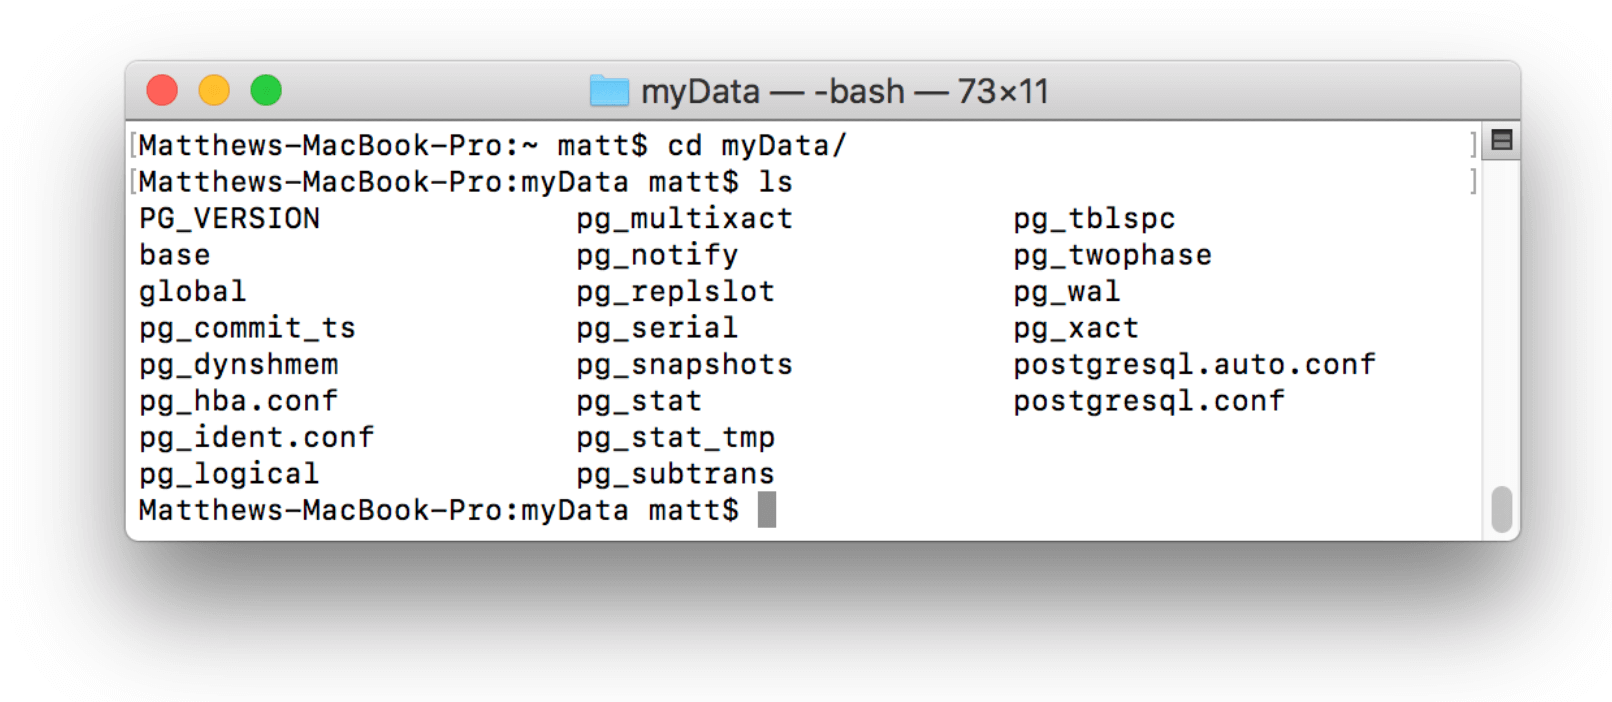
This will fill the myData directory with files necessary to run the server:
Now that the server is initialized and the log file is created, you can start the server from this directory. To do this use the command and substitute in for the specified values:
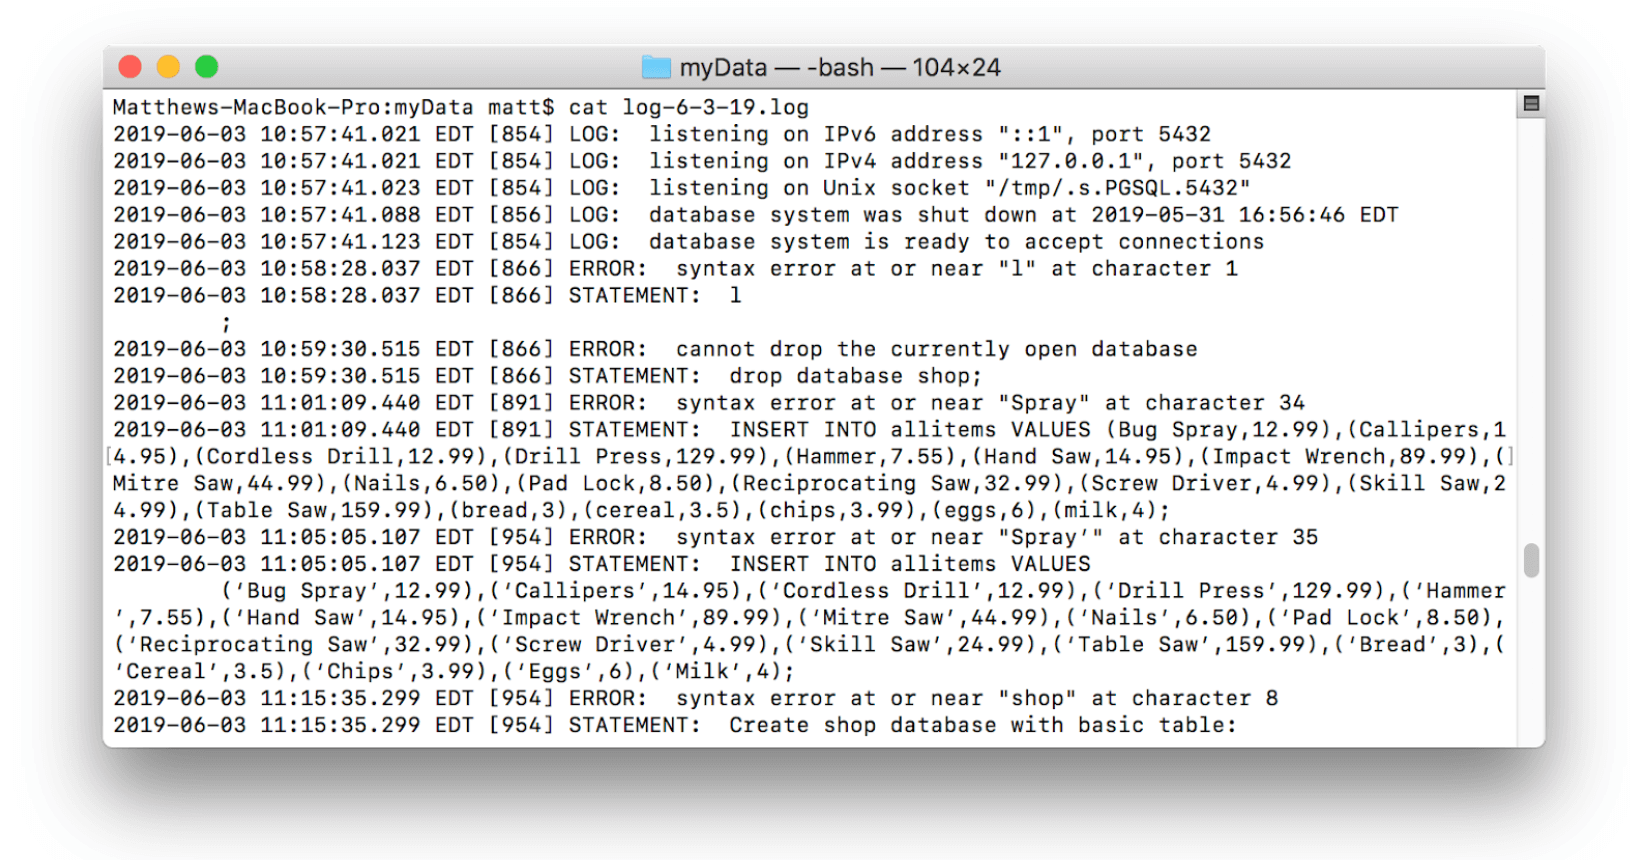
pg_ctl -D [Data Directory] -l [Log file] startThe “Data Directory” refers to the directory that was just initialized (in this case myData). The “Log file” is a file that will record server events for later analysis. Generally log files are formatted to contain the date in the file name (e.g. “2018-05-27.log” or “myData-logfile-2018-05-27.log”) and should be stored outside of the database that they are logging so as to avoid unnecessary risks. Log files can be dense to read but are very useful for security and debugging purposes:
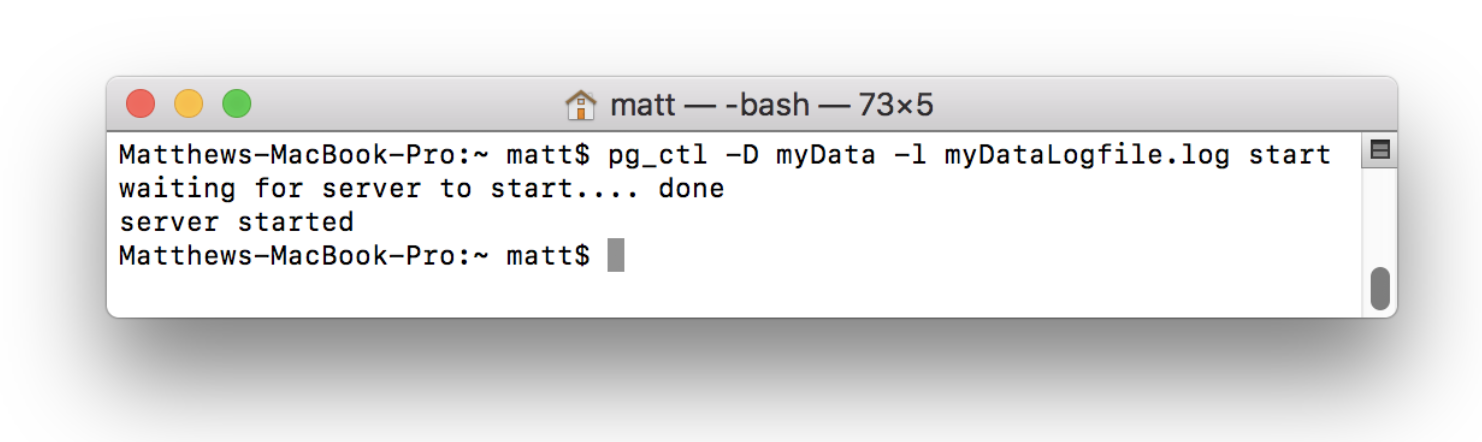
The command above will generate a log file like the one shown, start the server, and tie the log file to the server. If a log file is not specified, events will be logged to the terminal:
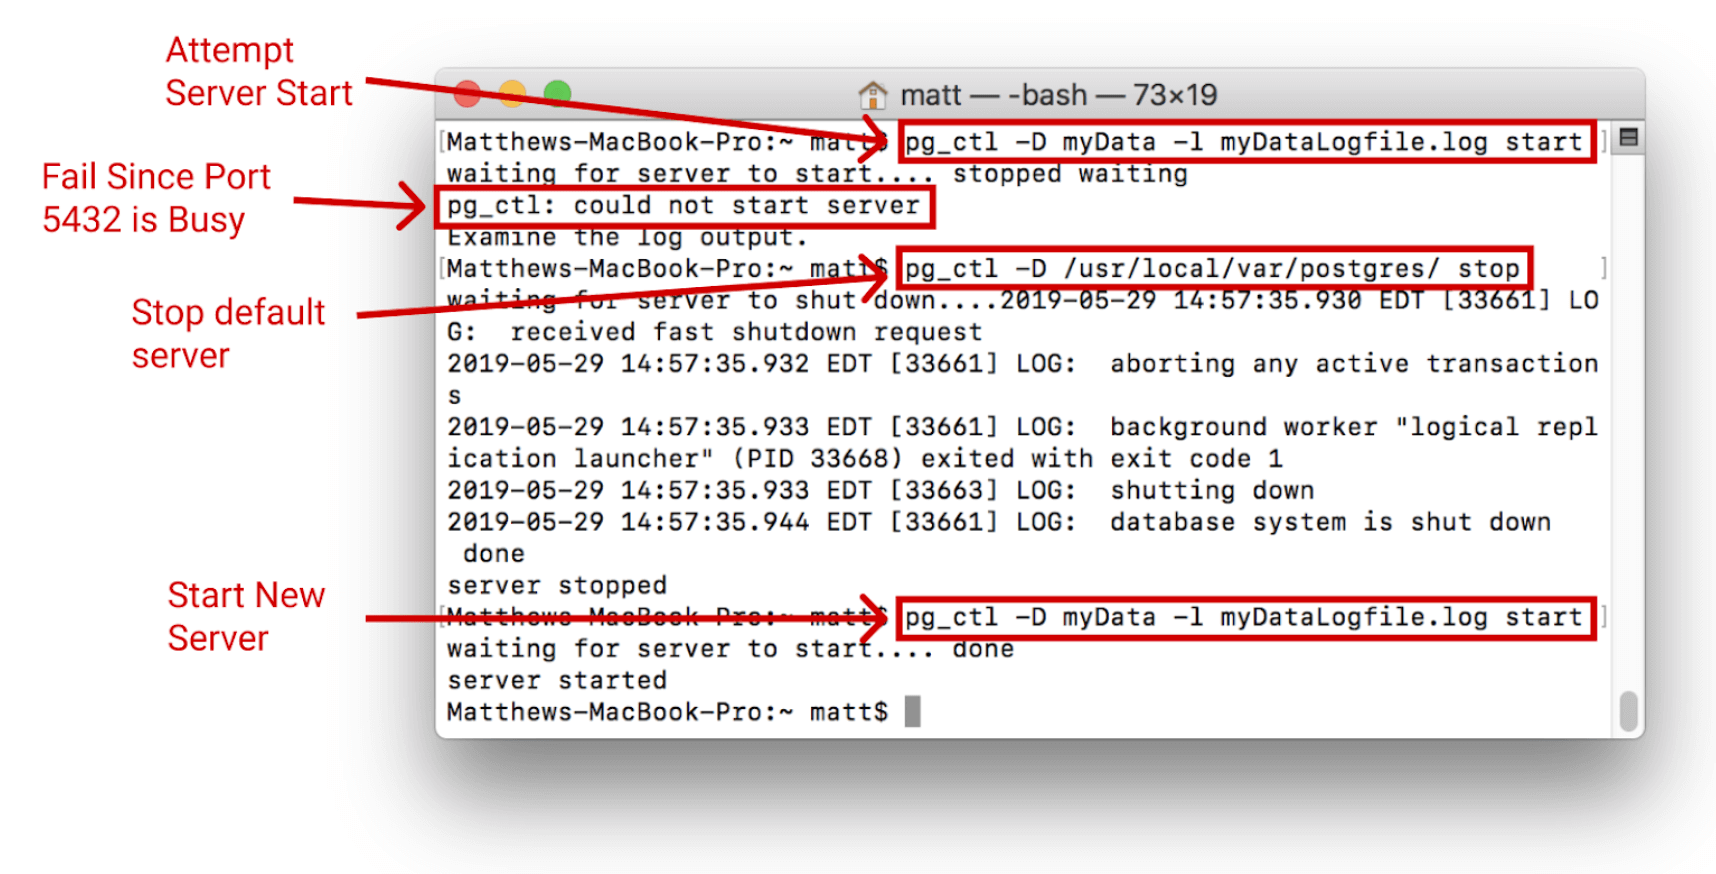
The server will only start if the port is free. If the default server is running it must first be stopped using the pg_ctl -D /usr/local/var/postgres stop command:
Once started, it can be connected to the same way as before using:
psql postgresUsing PostgreSQL app
To run a server through the postgres app, the first step is to download the program. The app can be downloaded on postgresapp.com. Once the app is downloaded and moved into the applications folder, the app can be opened.
Open the Postgres app:

In order to start the server, click the start button.

This will start the server. Details on the server can be found by opening the server settings:
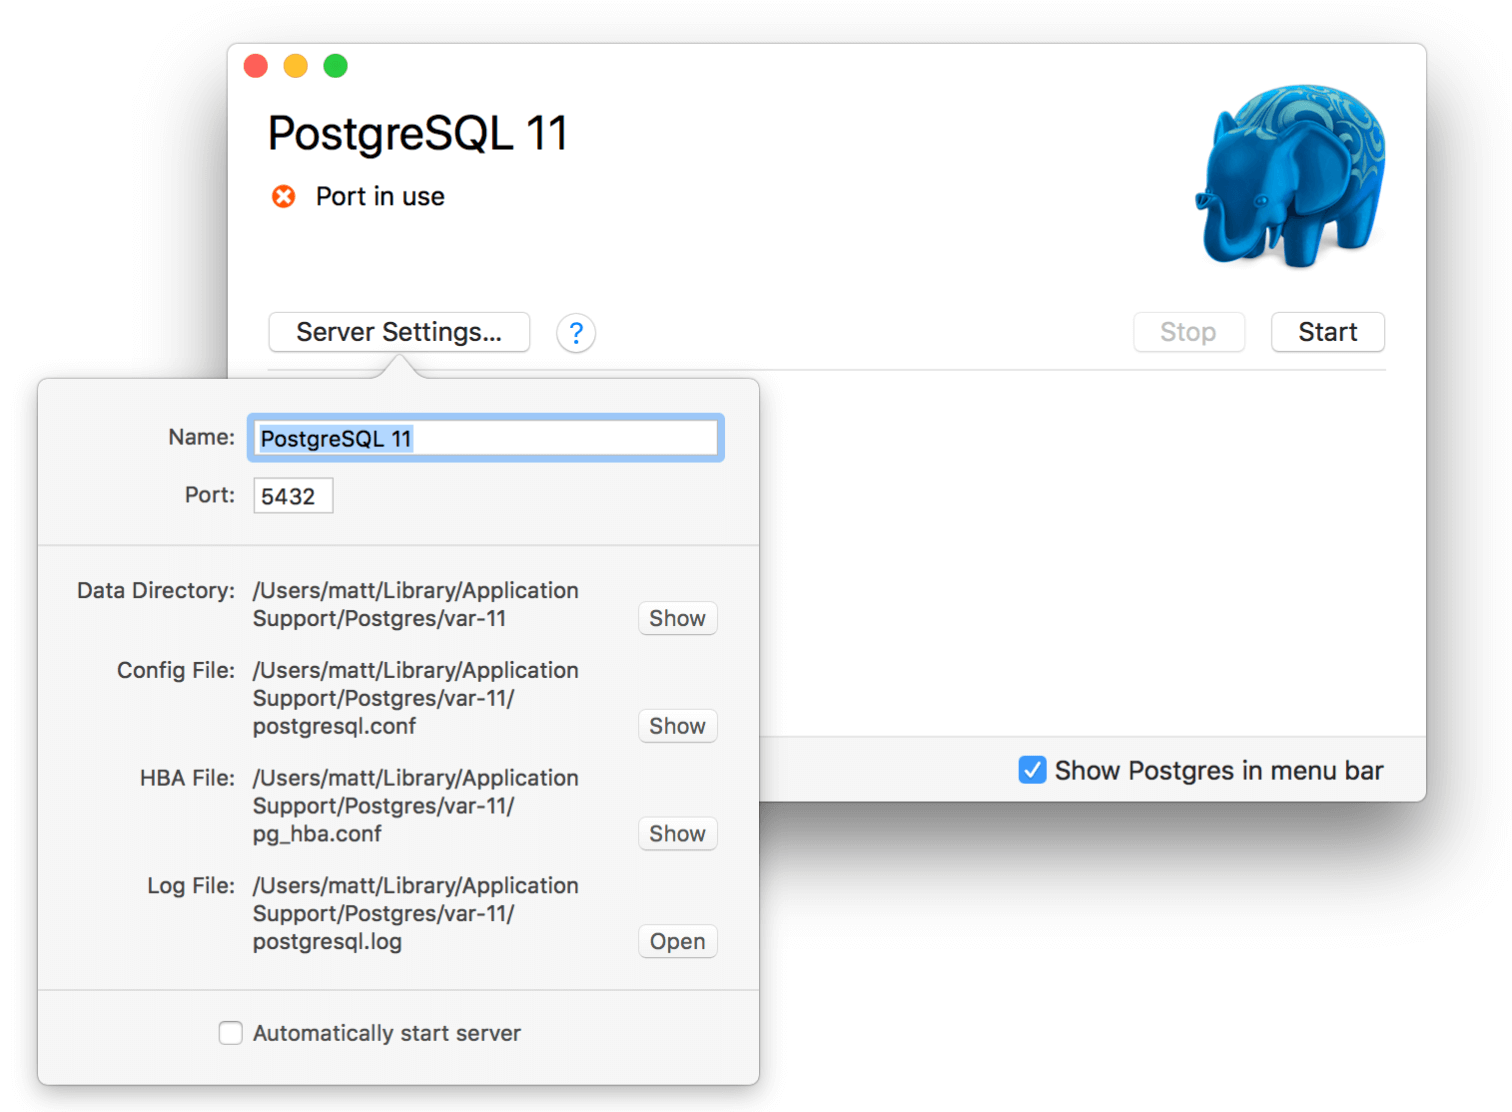
This interface shows all the essential information regarding the server. It also allows the port to be changed very easily. This is useful because multiple PostgreSQL servers can
Note: To change the port in the terminal, the ‘postgres.conf’ file (which can be found in the data directory) must be edited. This looks like the following:

Using terminal with the PostgreSQL app
Once the app has been downloaded, command line tools can be used as well. These tools can be accessed by typing:
/Applications/Postgres.app/Contents/Versions/latest/bin/[Tool Name][Options and/or Arguments]For example, the ‘postgres’ database on the server can be connected to using the psql tool with postgres as an argument:
/Applications/Postgres.app/Contents/Versions/latest/bin/psql postgresRather than typing out the full path each time however, the path can be added to a file that will allow significantly easier access to the tools, allowing the tools be accessed from any directory on the computer. To do this, the following command can be run in the terminal:
sudo mkdir -p /etc/paths.d && echo /Applications/Postgres.app/Contents/Versions/latest/bin | sudo tee /etc/paths.d/postgresappOnce this is done, the ‘postgres’ database can be accessed by simply typing:
psql postgresSummary
- Homebrew:
- Download/update Homebrew
- Use Homebrew to install postgres
- (Optional) Create New Data Directory
initdb
- Start Server
- App:
- Download app and move to Applications
- Run App
- (Optional) Set different port for multiple servers
- Start Server
- (Optional) Add path so that command line tools are easy to access